Showing posts with label Brand - Nailene. Show all posts

Saturday, December 3, 2011

winter nail art


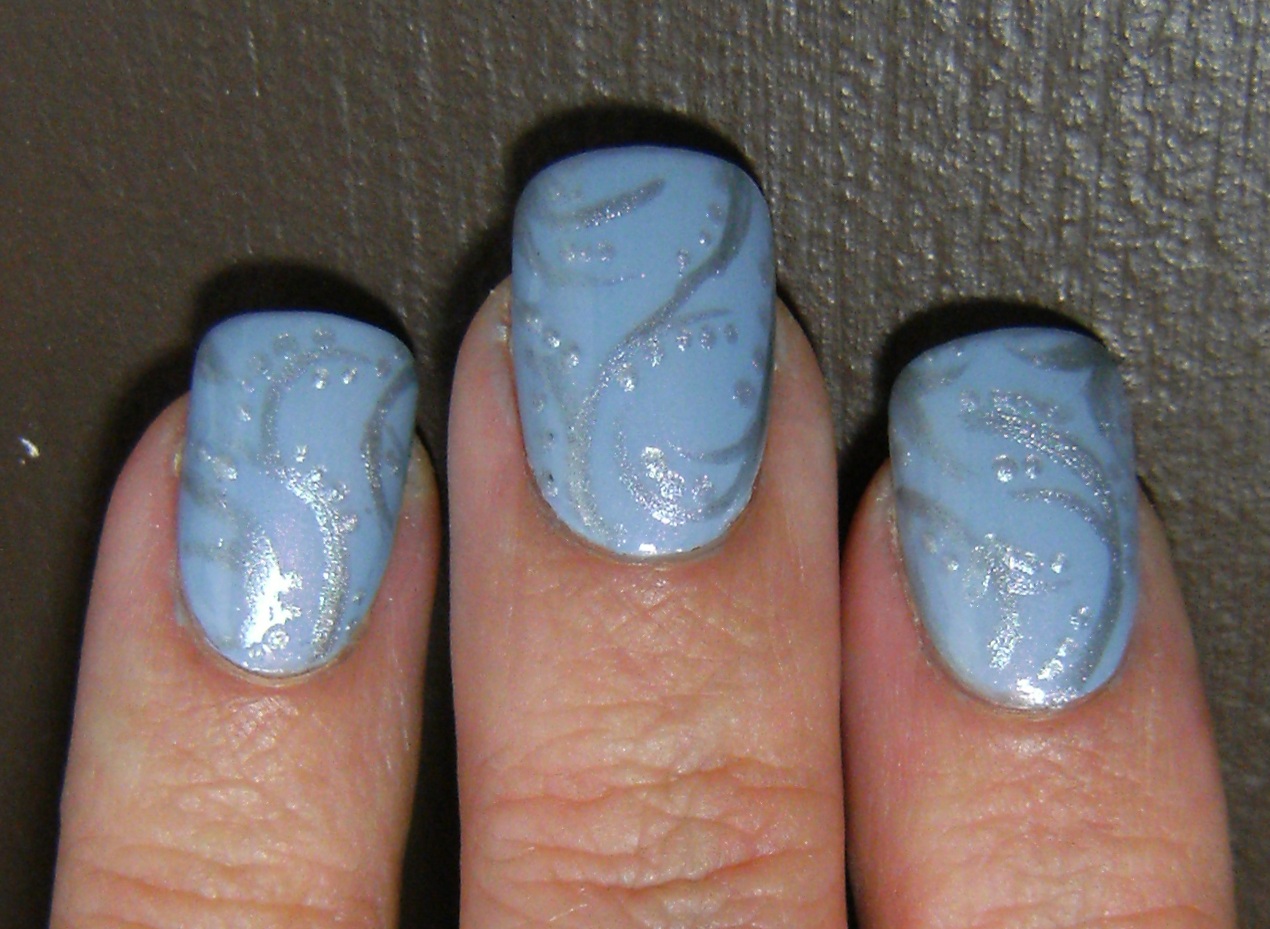
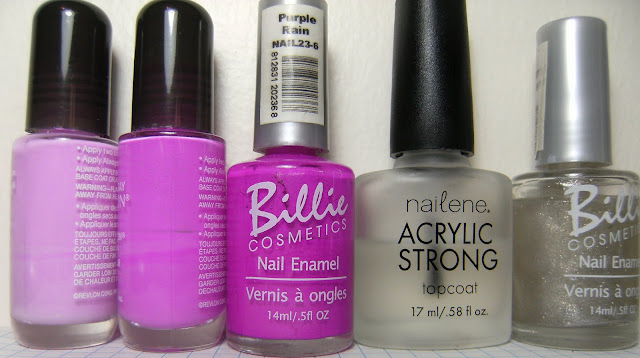
 Here is a pretty wintery mani inspired by Pallino Girl's post last week. The base is a sheer light blue with a subtle pink flash from Icing.....I needed 3 thick coats of this! This was part of a 5 piece set that I have had sitting untried for 2 years. All the polish in this set are very sheer and have this same subtle pink flash.

un-named ( of course ) icing set

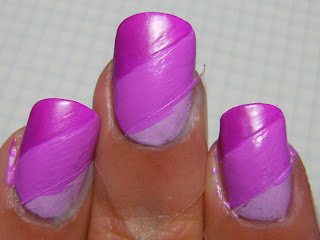
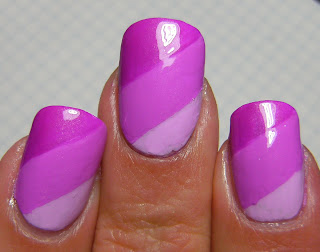
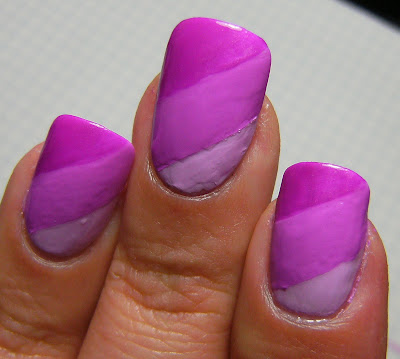
 I added the swirly's with Kiss Silvor nail art stripe polish and the dots with Fingr's silver dot/stripe polish. I don't have alot of experience with making dots with these squeeze tube polish's - however - this turned out okay.

I have spent the last 25 minutes looking for the new Nailene Nail Art set that has these squeeze tube polish's and  abunch of other nail art items..... I could have drove to Shoppers Drug Mart and took a photo in that amount of time! Dang! Has anyone else spotted it in stores lately?


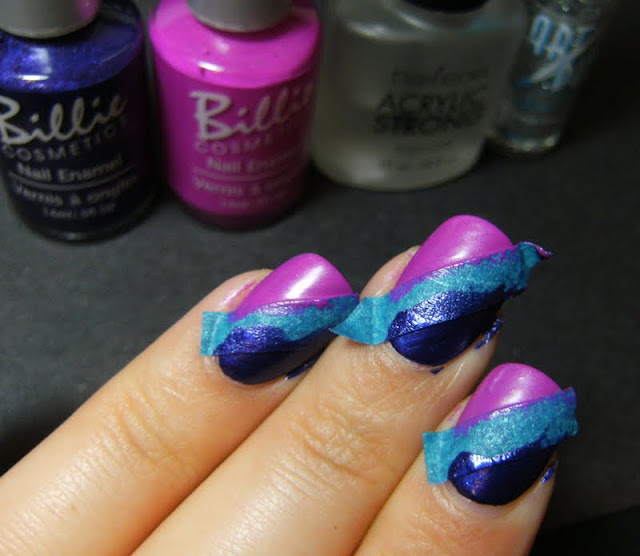
stuff i used; No-name icing polish, Kiss silver stripe and Fingr's ( Nailene )  squeezy-tube polish

3 coats, could use 1 more......

o

Monday, August 8, 2011

purple 3 stripe mani


( mini rant ) I feel like computers should be like the remote control for the television... you just click the buttons and everything does what you want. However, its way more complicated then that......

Here is a lovely 3 stripe mani, my base is the same greyed-out pale lavender artificial nails I had been wearing all last week, I applied a piece of painters tape diagonally across my nails, and filled the un-taped area with Billie Purple Rain, and Billie Mauve.

Before my polish was dry I removed the tape and 'squished' down any prominent polish ridges, then applied 2 coats of Nailene TC. I added the LA Colors glitter stripe polish on top of my TC.

This is striking, but easy nail look. I stuck a piece of blue painters tape to a cutting mat, then sliced 1/4 pieces for these nail guides using a utility knife.


apply tape over base colour, fill in with 2 other polish colours


remove tape, gently squish ridge and apply TC


see.... all those ridges and polish oops get covered up by the glitter


... I keep reminding myself to pick up more of these glitter stripe polish's......


o


Monday, April 11, 2011

another pretty purple franken mani = stripes ?


here is another simple mani I created using the franken polish's I made recently. I tried to use scotch tape for this mani but ended up doing it without scotch tape. I think that using the thick polish that I used for this manicure was a bad idea. Next time I try something like this I will use normal nail polish because this dried very fast and created alot of bumpy-ness and texture.

I added a coat of a franken i made with some shimmery micro-glitter polish and alot of clear. I made it for this specific situation when a mani that I just did needs some camouflage for flaws such as lumps/bumps gouges etc.

.... and another gif~

polish - top coat - shimmery micro-glitter top coat
Make gif


frankens, Billie Purple Rain, Nailene Top Coat and a shimmery franken I made for layering


I used tape for the first layer, but ended up doing it without the tape, my lines are surprisingly straight! I had to go over alot of areas and it became very bumpy and lumpy.


this is with a coat of clear and a coat of top coat.


and this is with a coat of the shimmery layering franken. I disguised the lumpy-ness with the micro-glitter polish


check out how lumpy this was, I need like 3 or more coats of TC!

- strange I did not take a finished photo of this manicure with my regular hand poses. I will try  this again with slower drying polish, and without any tape. The shimmery sparse glitter I used hides all the little mistakes I made. I think that tracing the lines with a glitter stripe polish would be beautiful, too!


Sunday, April 10, 2011

Plug Yourself Sunday and an easy diagional mani


 2 coats of my franken Integrity, I placed a straight french tip guide diagonally across my nail, then added 2 coats of my other franken Faith. When it was dry I removed the french tip guide and added 2 coats of Nailene Top Coat.

Please add a link to your nail blog in my comments section ~ I will add it to my blog roll, and a link to your blog in tomorrows post.


and a gif - these are easy and fun to make. I use LooGix gif maker, I think this is showing the photos too fast, but I can't remember how to fix it.

Create gif


Indoor Florescent


Franken Integrity - 2 coats without TC


..... and with both polish's I used Franken Integrity, and Franken Faith

Monday, March 28, 2011

Franken - Is This Love


Franken 'Is This Love', 3 coats without TC

For this franken I used a very opaque white creme, Billie French White with NYC East Village. The shimmer from NYC East Village is still very apparent, it turned into a bright noticeable teal/blue. I am very happy with this franken, the formula is lovely and dries fast for me. NYC and Billie polish's are my two of most reliable brands.


I used NYC East Village, a white creme from Billie Cosmetic's...... and my franken 'Is This Love'


with NYC East Village

sun

indoor fluorescent

 ♥

Friday, March 25, 2011

East/ West Village Franken


NYC EAST Village and NYC WEST Village - a 50/50 ratio made this lovely franken. This is 4 thin coats, with my MIDDLE nail at 2 thick coats, which resulted in some bubbles. Wish I could get some sunshine pics of this = will do comparisons tomorrow.


Also - I think Blogger reset everyone's blog so that you have to verify you are human, and not a spam robot from the future. When I went to comment on blogs that did not previously have this the verify catchpa thing came up, including on my blog = = =booooo! those things annoying, but necessary to stop spam.


 NYC West Village & NYC East Village made this lovely franken 

 I am naming this polish 'Dude Looks Like a Lady' for the anonymous e-mailer who thinks I am a dude. I actually think that early 90's hair metal ballads will be the name of this collection of frankens (see my post from yesterday ). So i will have plenty of cool names. - its actually kinda hard to come up with names for my frankens - so 90's glam rock/hair metal it is! ( those are the same things, right? )


I will do comparison to other peacock-like colours tomorrow. This polish is just a straight up dark blue with teal shimmer, there is no purple or gold in here - it is very pretty and I actually wanted to purchase a polish just like this. it still needs 3 to 4 thin coats but dries FAST!!!!!

- the stickers come off very easy on these -


Here is the post on NYC EAST Village, it is a very sheer teal shimmer that needs 5 or more coats to opacity.


And HERE is the post on NYC WEST Village, which is a dark shimmery blue - it can be opaque in 2 coats and dries very fast - too fast, but I like my polish's like that!!!!!


Thursday, March 24, 2011

Claire's Goldmine & exciting new frankens!!!!!

above - Claire's Goldmine, 2 coats layered over Billie Gold metallic w/ 2 coats of TC

But first frankens!!!!!!!I found a few bottles of NYC East village on sale a few months ago. I knew I would  be whipping up some frankens with them eventually. I finally got around to it this evening. Before I knew it it was 10:45, my whole evening spent franken-ing! All my frankens turned out as I envisioned they would. I am so excited to wear them.


 NYC East Village5 coats w/ TC = This polish is pretty layered over other polish's and it did dry fast..


NYC East Village is a ridiculously sheer teal shimmer. HERE is a previous post I did on this polish The only polish's I used for these frankens below were NYC West Village, a Black creme, a White creme and a shimmery sparkly Icing polish. These were very simple to make. taking your time, adding drop by drop for deep pigmented colours and taking notes is they way to go when frankening.

I will be doing individual posts on these starting tomorrow. Sorry about just bottle pic's and small swatches.... I had to post this asap, because using this for frankens worked out excellent - plus the labels peeled off more easily than any polish label I have come across!

( I picked these up for 72 cents each last Autumn)

and my frankens, with the OG at the end


.... and a few more photos of Claire's Goldmine, 2 coats w/ 2 coats of TC


Tuesday, March 22, 2011

a sheer boring gold shimmer, new old stuff and a few more nail blog links I missed yesterday ♥


No-Name Icing gold shimmery polish, 2 coats layered over Naturistic's Chrome in Solid Gold with 1 coat of TC.

This polish, along with the others that came with it in the mini 5 set are very sheer. They are build able but need 4 to 5 coats to hide VNL. I'll have to hunt around for some photos where I compared this to something else.

Also; Here is a few more nail blog links, I thought I had these on my list for yesterday - oops!


no naked nails

polish art addiction

ferahfezas favourites

spellbinding nails

moondancer jen

seriouspolish junkie

paint that nail


...and some old school Nail Fetish nails I found at my favirote dollar store in town.... a long, long time ago I had these in forrest green, they were a gift from my friend 'C' who bought them a gazillion years ago, and I also recieved some from another friend 'A'  as a gift as well. I was surprised to see these in the store, so of course I had to but them.

I am not sure how old these are but I love pre-painted artificial nails

L-R, vampy red, bright copper and shimmery lilac


anyhoo- here is a few more photos of this sheer shimmery polish.


I have layered this sheer gold polish over 2 coats of Naturistic's Super Chrome in Solid Gold