Showing posts with label Colors - Grey. Show all posts

Wednesday, July 24, 2013

Icing Shredded with Icing Swept Away


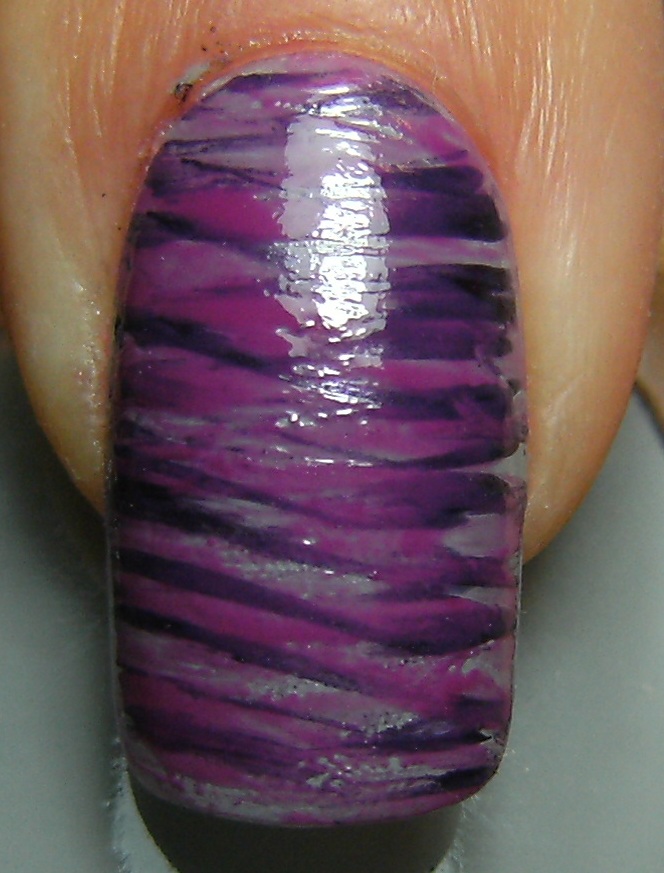
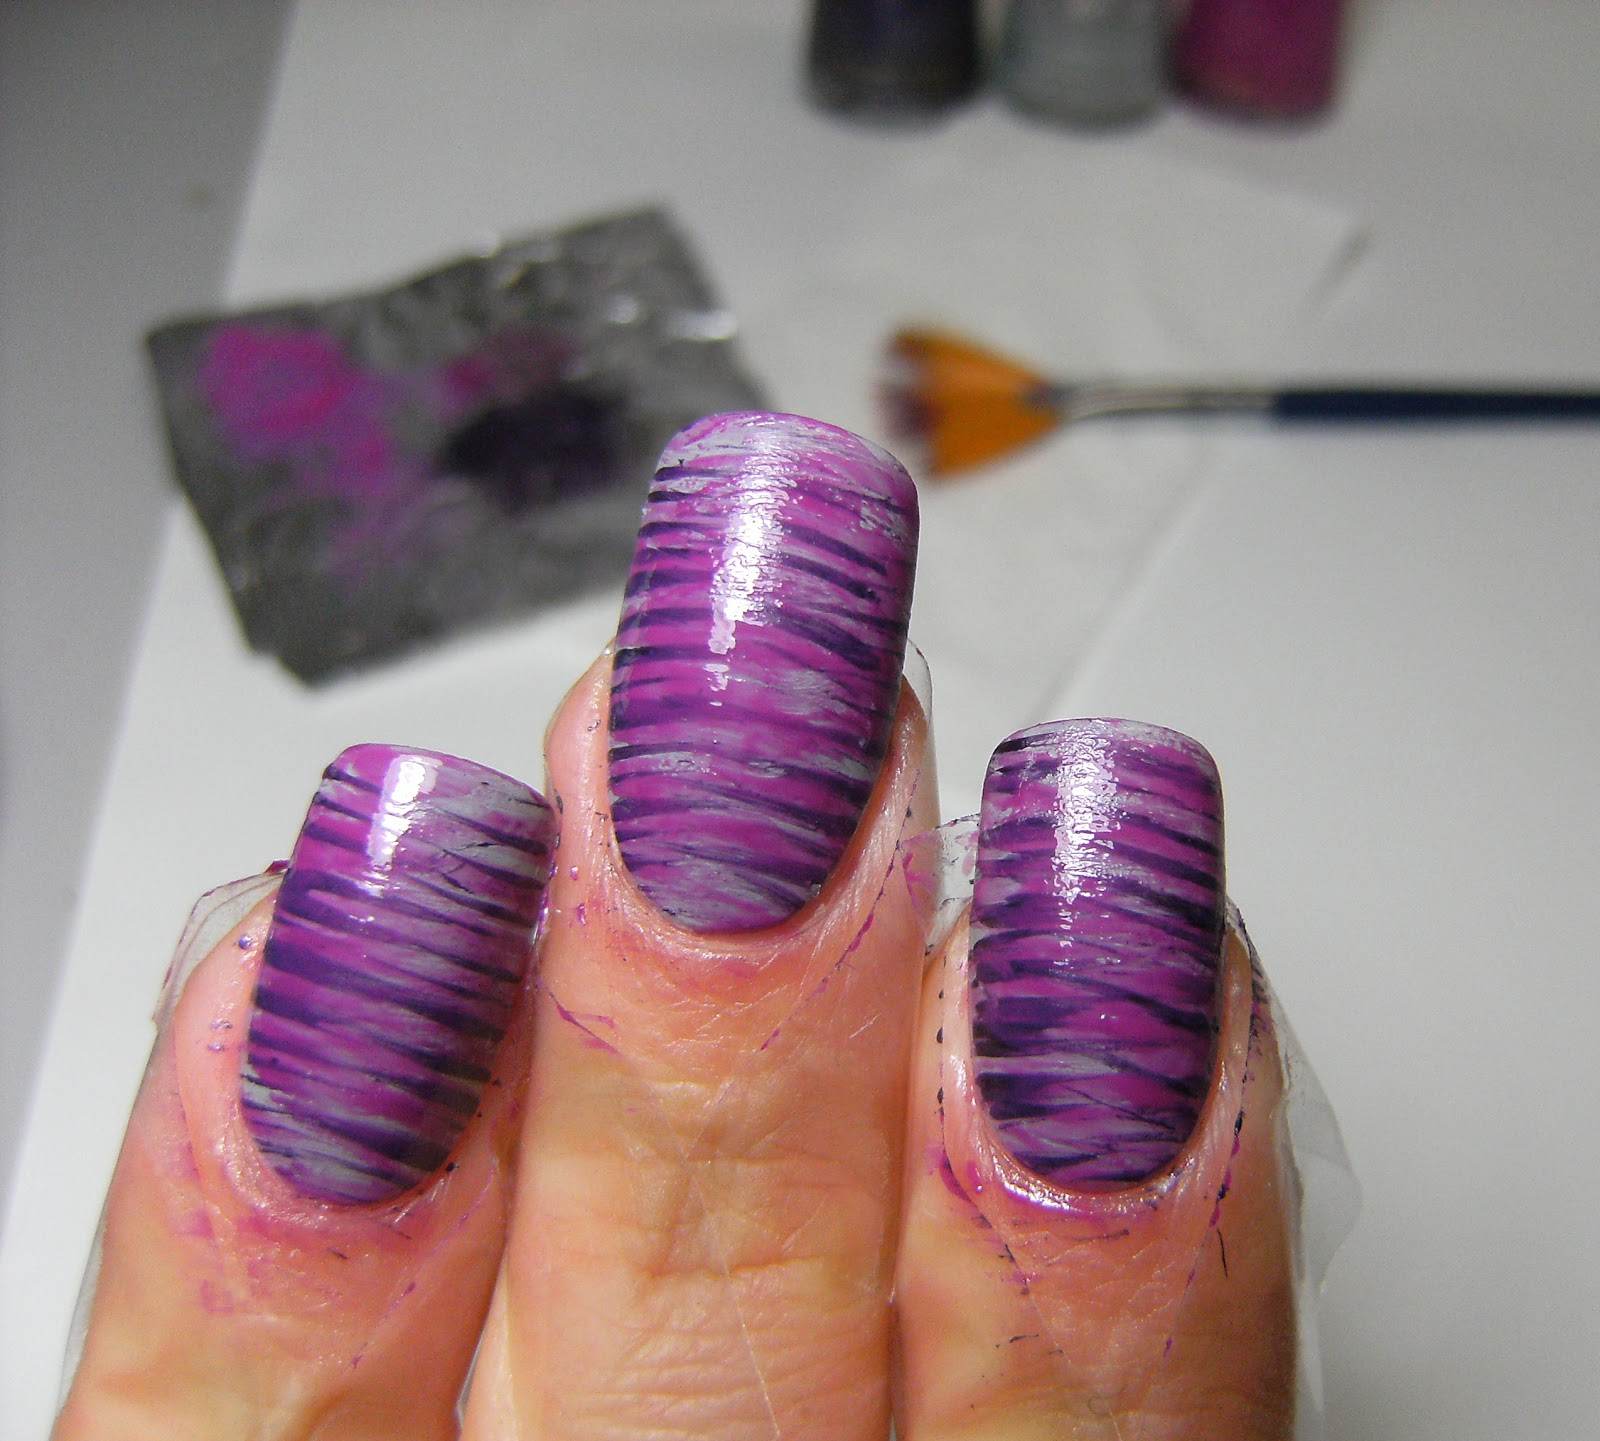
 "Shredded and Swept Away', that sounds like a painful autobiography title. This was 3 fast drying coats of icing Shredded over a pretty grey creme. THIS POLISH SMELLED AWEFUL - but it's so cool! I don't think I have ever used an Icing polish that smelled bad. It is definitely going to go into my smelliest nail polish list.  This mani is 3 coats of Icing Shredded layered over 2 coats of Icing Swept Away.

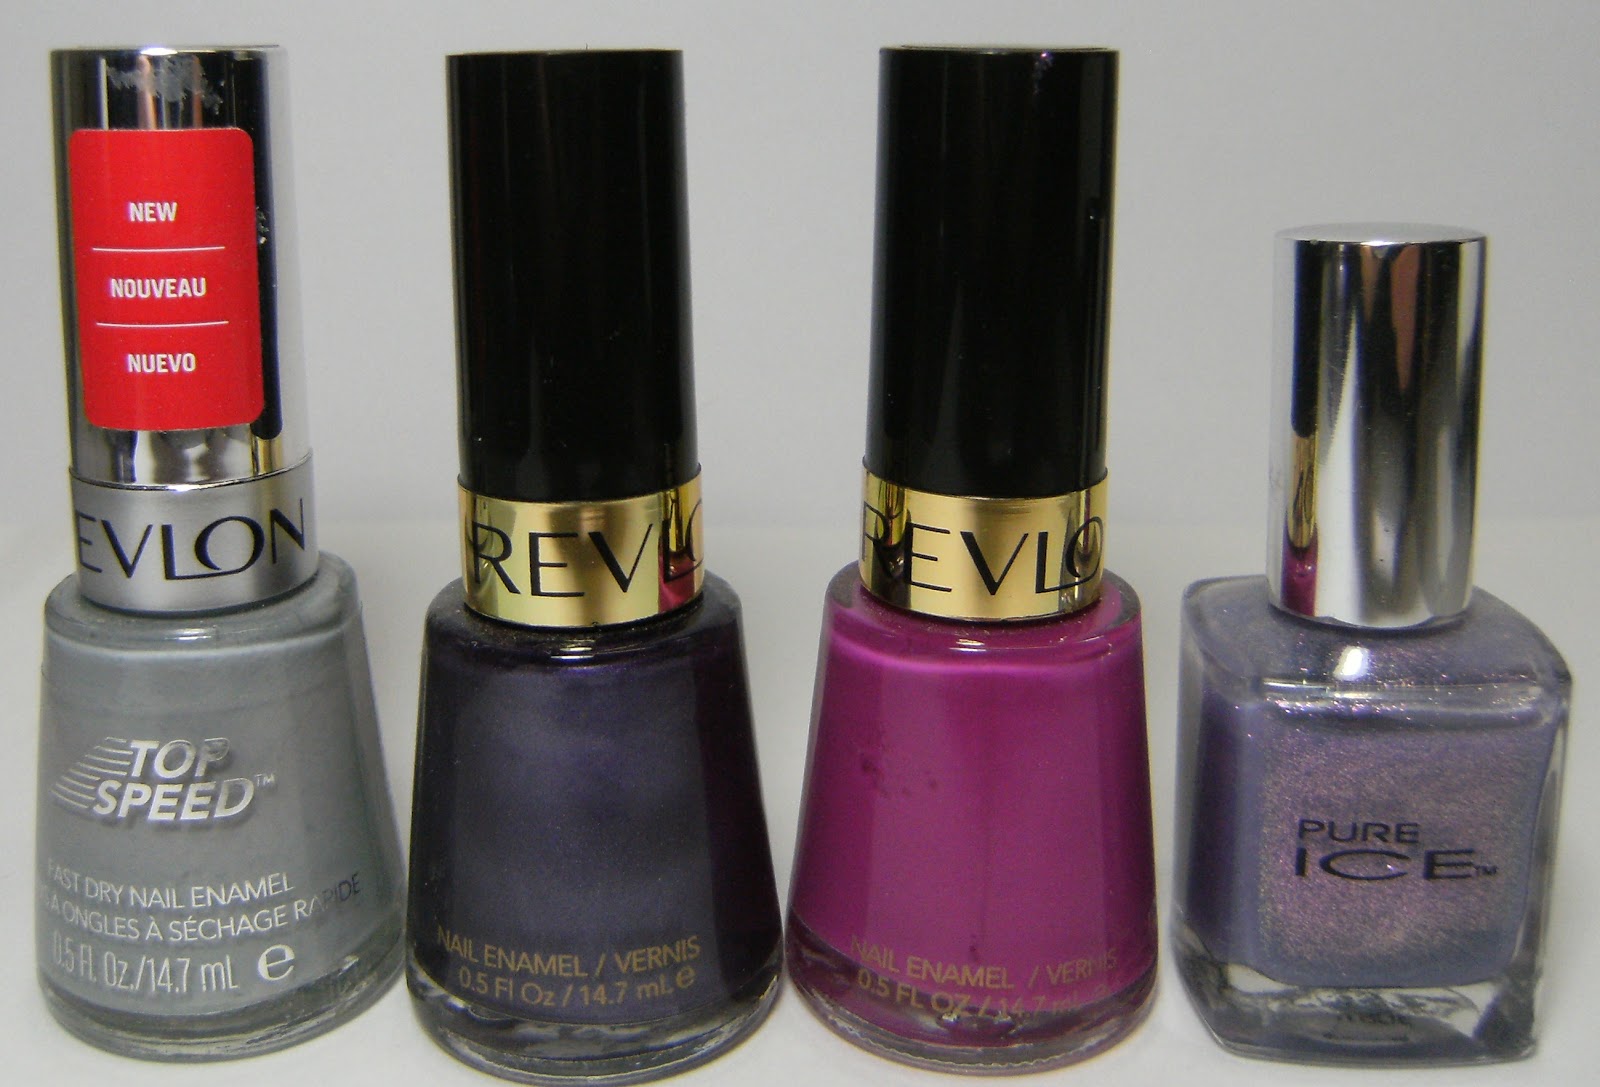
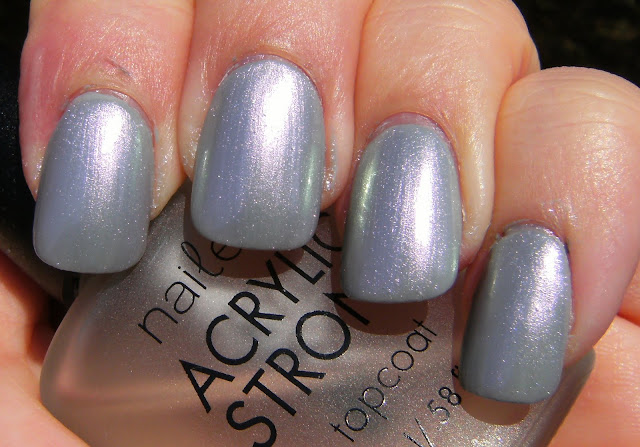
Icing Swept Away is a medium grey that has a bit of purple to it. The formula was the same as all the other  Icing polish's in a creme finish I have tried - It definitely smelled like a normal nail polish, lol.

I did not add TC to this mani as I took it off immediately after the photos. I didn't want to have a smelly nail polish on my nails when it was potato chip night!... As you can see from the photos and as with most of these types of polish's =  at least 2 thick coats of TC are needed to hide the bumpiness.

I want to wear this polish again in the near future but I plan on adding copious amounts of TC to disguise the smell ( and bumpyness ). Has anyone else out there used an Icing polish  that smelled aweful?


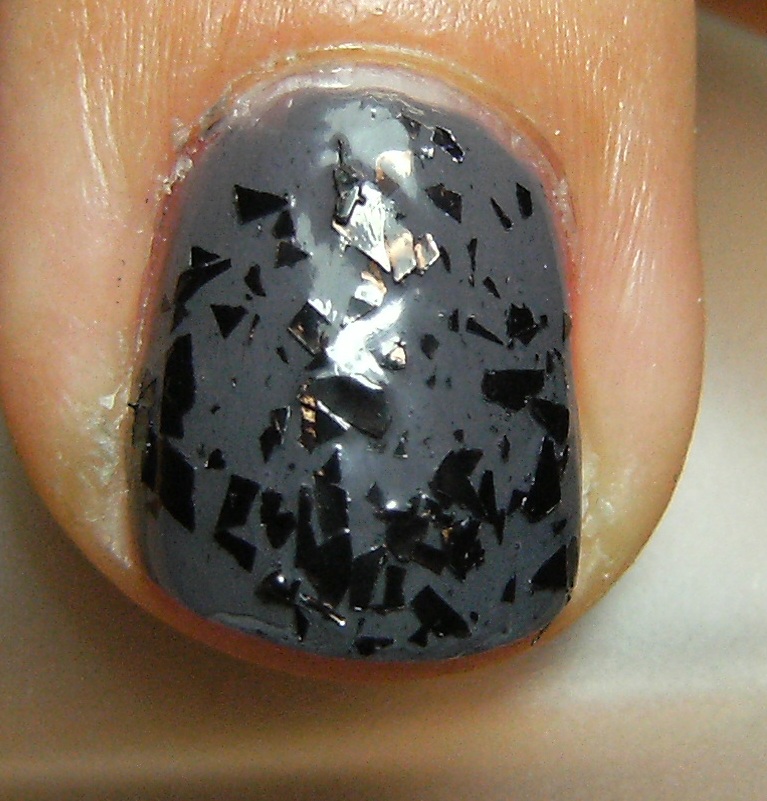
  @ 1 coat ~ I was hoping I would get a bit more coverage of the black shards considering the polish  looks pretty dense in the bottle - I was a little disapointed at the first coat but this polish dried fast.


@2 coats ~ The black shards started to fill in the sparse areas. For the third coat I tried to pick up a few of the black pieces in the neck of the bottle and dab them on where my nail was a little too bare. I added a final dip and sweep and called it a mani!


 Icing Swept Away - 2 coats  - no TC


............. and one more
o


Monday, March 18, 2013

Janky Stripes & snow day!


I usually do alright when it comes to stripes like this - however this time, I placed my tape all wonky and I did not even notice till I painted my nails and took the tape off.---- boo! Once again Pure Ice Busted saved the day - just like in real life, a coat of Pure Ice Busted solves everything.

Because I am a rich millionaire with gold and diamond encrusted nail buffers and platinum cuticle sticks, I purchased these Sally Hansen CSM's full price for 8.99 at Shoppers Drug Mart..... Ha ha - just kidding! I found these at the DollarRama for 2 bucks, these Sally Hansen's are not that amazing that they should be 9 bucks! Come on Sally Hansen! Seriously who set the price point on these.  I am definitely waiting for them to be on sale if I pick up any more of these CSM's.

Ok that was mean - Sally Hansen CSM's have good formulas, good dry time and a vast choice of colours..... just a  tad pricy when NYC's In a New York Minute and Sinful Colors are just as good. Actually, every Sinful Colors polish dried faster then the Sally Hansen Complete Salon Manicures that I have tried...... hmmmmmm......

Anyhoo - for this mani I started with a base of Sally Hansen CSM in Greige Gardens TM ( LOL).  I placed my tape diagonally across my nails then added 2 coats of Sally Hansen CSM Plum Luck. When I began removing the tape I was pretty peeved that my placement was so off, and that some of the darker polish bled under the tape  So I added a coat of Pure Ice Busted..... and went on with my day. From far away it's not that bad - but I noticed it.


stuff I used- Sally Hansen CSM in Greige Gardens TM, Plum Luck and Pure Ice Busted

I didnt notice how 'off' my tape was before I applied the second colour to my nails.

LOL @ my middle nail
o

Sunday, March 17, 2013

fan brush nail art


 I have seen this fan brush nail art a few times and it always looks great! I am not sold on it yet as this was my first try - - I think adding Pure Ice Busted made me like it alot more then just the 2 Revlon polishes alone.

For this Mani I started with a base of Revlon Hazy, a grey creme, then used the fan brush to make these interesting whispy stripes. Some people are getting super duper thin whispy stripes and they look amazing - I'll be striving for that next time I try this.

fan brush nail art                      ----                       w/ Pure Ice Busted

 stuff I used - Revlon Hazy, No Shrinking Violet, Plum Seduction, and Pure Ice Busted


  I found the fan brush at the DollarRama ( Canada ) I made sure to tape around my nails to prevent having to do an acetone clean-up later.

Revlon hazy - a grey creme and the only Revlon I have ever purchased that I can say I am happy with. If I purchase any more Revlon nail polish's in the future I will make sure they are either opaque creme polish's or heavy duty glitters.


Here is my right hand that turned out pretty crappy - but it is my first time and I am sure if I try this again I will get better!  It was hard to pick up the right amount of polish with the fan brush ..... I will definitly try to use a slower drying polish in the future as well.


I did a practice run with colours that I thought would look good together

a few more glamour shots.....


o


Monday, March 26, 2012

Rain Dwops


here is an easy mani using a dotting tool, if you dont have a dotting tool, you can use many different items, a bobby pin or a dressmakers pin stuck to a pencil eraser works decently. If you are in the market for some dotting tool, Born Pretty has a nice set of multi-sized dotting tools.

( pardon moi cuticles......I am trying to keep my camera non-greasy lol )
  
This photo is without Top Coat..... I think the texture of the circles looks really cool w/o TC

stuff I used; Sally Hansen Salon Dorien Grey, Xtreme Wear Blue It, Blue Me Away, Marine Scene

I found this lovely SHS polish at Walmart for $7.97......................

Just Kidding! I found it on the bargain rack for $1.00

While there is definitly some beautiful colours in the Sally Hansen Salon Manicure collection - but there is no friggen way I would pay more than 3 bucks at full price for these. Thats why I paired this polish up with the the Sally Hansen polish you should purchase - X-treme Wear. When I was adding dots to this manicure The X-treme Wear polish was drying before the Fancy $$$ SH Salon polish did! I did an experiment covering a full nail with the SH Salon polish and the Xtreme Wear and the X-treme Wear polish STILL dried faster.


I used a dressmakers pin stuck intot the end of a pencil eraser for the large blue dots

I used my regular dotting tool to add various sized dots of Sally Hansen Blue Me Away

 Then I added Marine Scene, being sure to overlap some of these dots because this polish is sheer and will add a bit of depth especially over Sally Hansen Blue it

I really Really like this, I saw something simialr on Pinterest ( DON'T go there ) and had to copy ASAP

indoor flo

Glorious Sunshine
o


Thursday, October 20, 2011

Mummy nail art


I really like the look of this! I smeared the polish when I applied clear over the nail art = I should have waited a little longer = This was not hard to do, but I think that I let my black nail art polish dry out and so I had some polish strings and lumpiness......

The base of my mummy nails is 3 coats of Claire's Grey Matte, I used black and white nail art polish from The Bargain Shop! ( Canada )

I think I am going to try this look again without the eyes, possibly in a different colour combination. I surprised myself with making my lines so straight - see; practice makes 'sorta' perfect.


stuff I used Claire's Grey Matte, Nail art polish from the Bargain Shop!

o

Tuesday, April 26, 2011

BOOM! Glitter explosion


this is 2 coats of Revlon Hazy, followed by 2 coats of Sinful Colors Aruba Rhythm. i used my new stripe polish to create the lines, then applied a blob of clear polish and added the larger magenta holographic hex glitters to the base of the lines, then swept more clear polish sort of following the lines and gently sprinkled on the smaller holographic magenta hex glitter.

I tried to place the large hex glitter on my nail individually, but it was taking too long, so I added a blob of clear to the base and scooped it up and sprinkled it on my nail. I used a fluffy brush to pick up the smaller glitters and tapped and waved it over the wet clear polish. Glitter is fun to use for mani's but very messy.

This is one of my favorite easy to do looks. It did eat up alot of top coat - next time I won't use so much glitter. If it is a holographic glitter a little goes a long way.  On my right hand I did not add the shimmery Sinful Colors polish and did not add a s much of the larger holo hex glitter, I liked it better then with the shimmery polish and if I repeat this look I will be sure to use a plain creme base for my lines & glitter.


stuff  I used; Revlon Hazy, Magenta stripe polish & two sizes of  Magenta holographic Hexagon glitter

drew lines, blobbed clear polish and added large glitter to base of lines

 added clear polish along lines and sprinkled on smaller glitter

added 2 coats of TC


Revlon Top Speed Hazy, 2 coats with Top Coat

2 coats of Revlon Hazy & 2 coats of Sinful Colors Aruba Rhythm with Top Coat

I'm doing all my glitter work over the sink and washing down any fallout - glitter is messy but beautiful