Showing posts with label Brand - Avon. Show all posts

Friday, November 18, 2011

dry marble - and a few new blogs to add to my blog roll.........


I am trying to experiment with something awesome I saw on More Nail Polish and Enamel Girl.  I started out trying  the water marble where you do a design like a normal water marble, then drop a cut out piece of plastic onto the marbled design to pick up the design, let it dry then affix it to your nails - but it turned out terrible!

So instead - I did a drag marble on a piece of plastic, let it dry then affixed it to a tacky nail polish base..... it turned out perfect.

I can see this being a great way to have my non dominant hand have intricate designs that I cannot do as well free-hand, My left hand ( model hand ) always looks better than my right hand.

This Sunday I will set aside some time to figure out how to do a real water marble - then pick up the design with plastic. If you haven't already check out  this post from More Nail polish where she did a fabulous job with dry water marbling  and a much better job of explaining how it is done...... Water marbles can be so beautiful but I find them to be so messy - and many of the times I have tried they looked awful.

In the mean time I will mess around with swirling nail polish onto zip-lock bags..... I only tried this on 1 nail and so far it turned out very nice.

I applied this to a still tacky nail polish base

here is with a coat of TC

and here is with 2 coats of TC and after an acetone clean up 

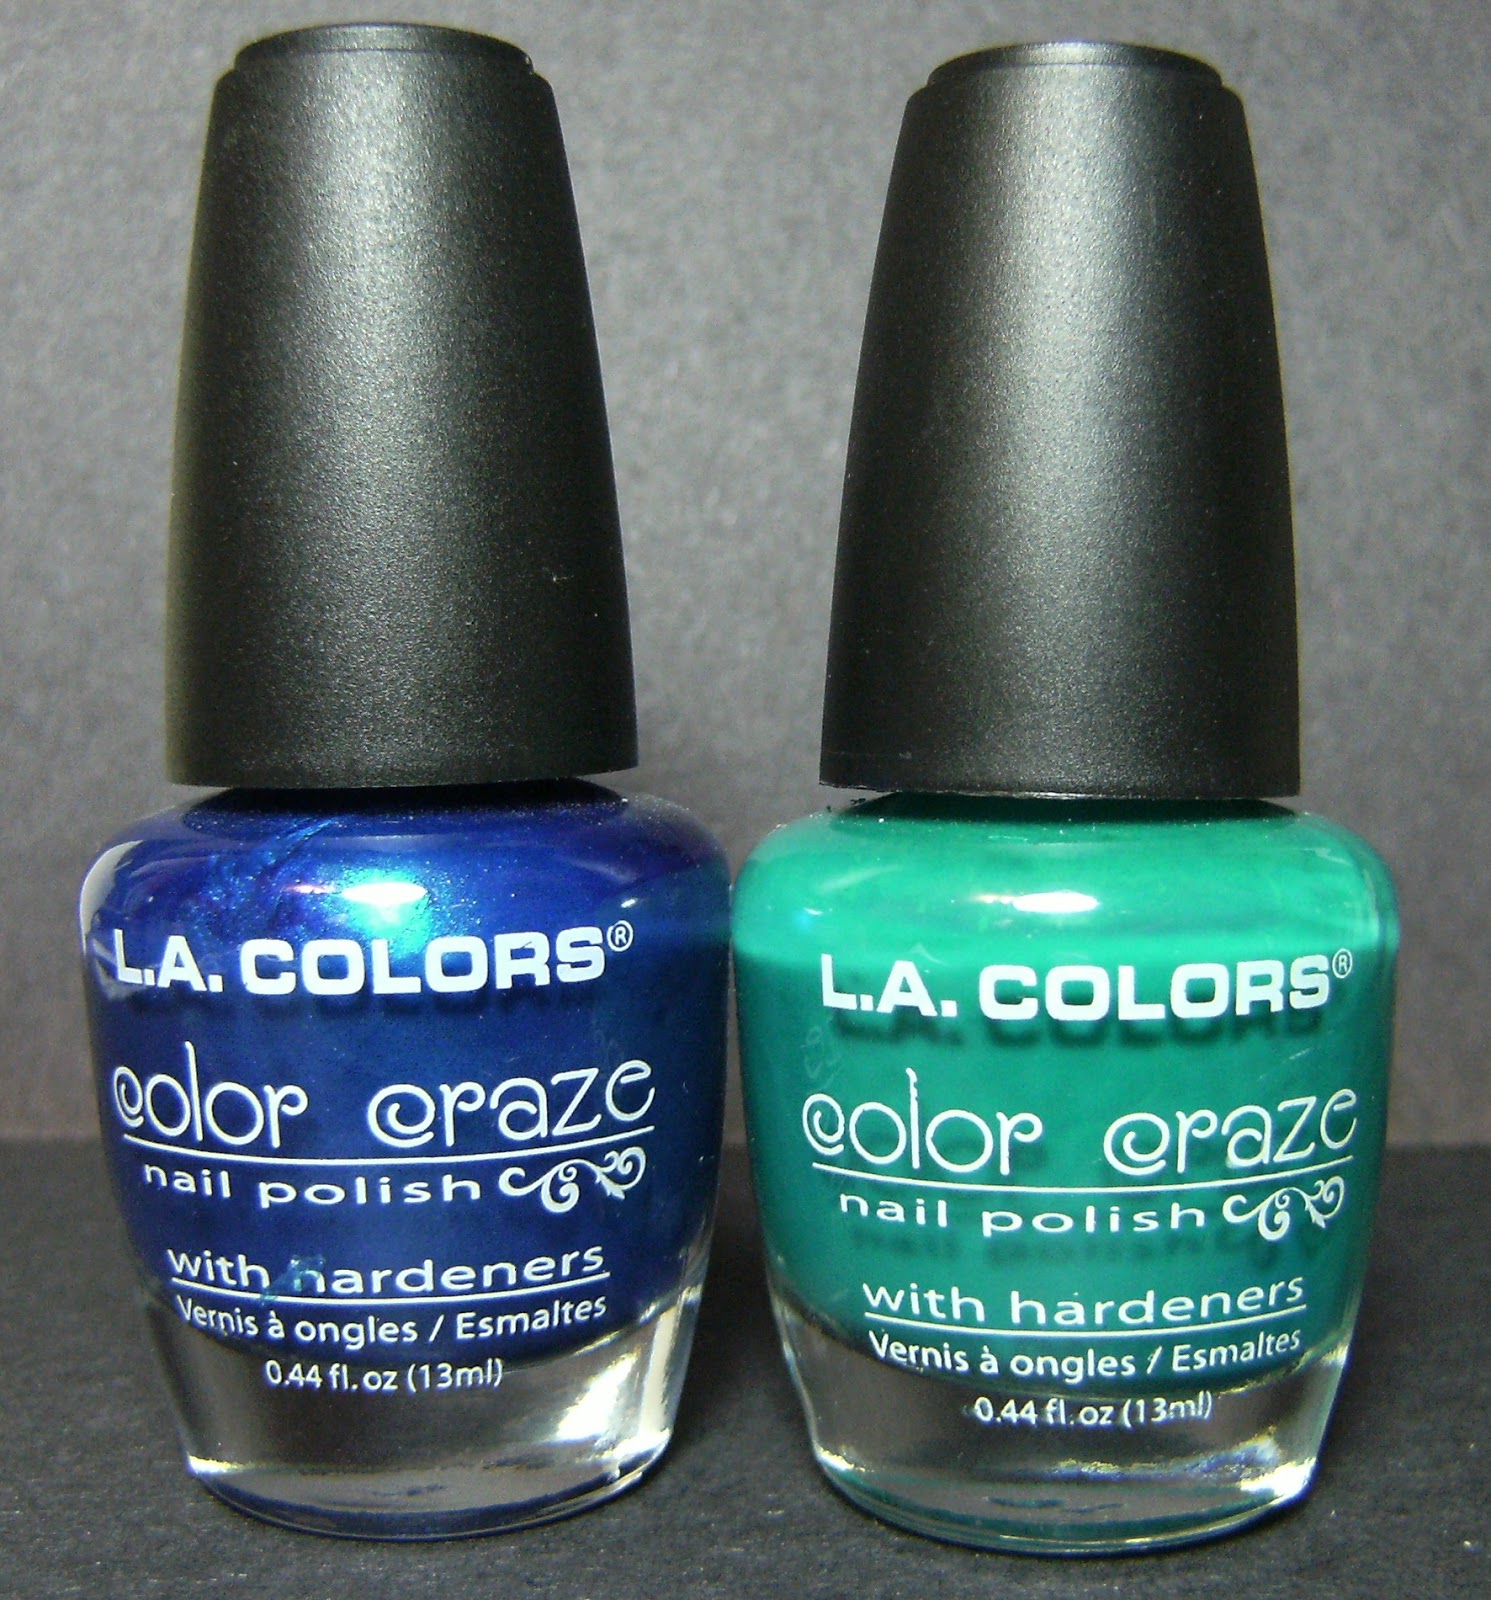
and here are the colours I used- LA Colors Static Electricity and LA Colors Atomic
~ o ~


.... and here is a mani I wore earlier this week,  The base is Avon Bare Necessity, I made a chevron shape with LA Colors Black stripe polish, went over the line with LA Colors Metallic Pink stripe polish, then added Kiss pink Glitter over that line.... The pink glitter did not show up as much as I hoped it would. I added a coat of TC to my nails, smearing the black on my index - boooooooo!


 and finally a few blogs I added to my blog roll - I have been lacking on my blogroll, sorry!

  omgnoodles

 A nail  polish affair 

 nail passion 

 tip-top-nails

 cosmetics freak

 nail polish-addict 

 life and slight obsessions 

 nails and stuff 

 pistols and cobras 

 hold ur colour 


As long as your blog has 86.342839 % nail polish related content I will add it to my blog roll- It may take a day or two ( or 2 weeks ) but I will get it up there!

I have taken a few blogs off that had questionable content but for the most part I like that there is almost 800 different nail polish related blogs on there I am very Happy that there are soooooo may people sharing all their mani's, shopping hauls and tips and ideas - - -  Thanks everyone for posting all your stuff!

o


Wednesday, October 26, 2011

2 kinda boring orange mani's


My heart isn't into Halloween this year; last year I had all my interior decorations up by Oct 1st and I am just starting to decorate this evening! 

Also, any time I am way for a few days and come back to add posts to my blog - there seems to be problems with blogger. I think this is the 4th time that I have gone away, then sat down to post and blogger is fudged up. Or maybe it's just my blog. sigh. It took 20 minutes to get photos into a post = whats up with that?

Anyhoo - I love the finish of Nicole Fresh Squeezed, but hate that it is streaky and needs like, 4 coats. Here I have layered it over Avon's Bare Necessity which is a pinky mauve.

 This is a better photo of the actual colour.....


 The base was Avon Bare Necessity, 2 coats of Nicole by OPI in Fresh Squeezed

 Scotch tape manis are a fine art - I tried to do an orange/green scotch tape look but it turned out terrible - even glitter wouldn't fix it.  I used Avon Olive Green ( USA version )

 ....... and here is how I make good use out of polish with a nasty frost finish...... Sponge! I started with a base of Wet n Wild Sunny Side up - 3 coats - then sponged on Nail Fetish Clash, then added a coat of Love My Nails Dazzling. No TC in these photos.

Bright oranges and pinks always mess with my camera..... I'll have to hunt around on the Internet to figure out what I can do to counteract that problem.


 Wet n Wild Sunny Side Up, Nail Fetish Clash, and Love my Nails Dazzling


 o

Monday, June 27, 2011

Avon Bare Necessity with glitter


This is 3 thin coats of Avon Bare Necessity, with an addition of a holographic multi-sized glitter franken. I sprinkled on some purple holographic glitter as well.  after sprinkling on a small amount of glitter I gently pressed down on the surface of my nail to get all the glitter laying flat. 

I wanted my nails to look like they had a casual addition of glitter. I like this type of look as much of the original base polish is visible and it is a nice contrast between the creme polish and glitter. For the glitter franken, this is Claire's Hollywood, a multi-sized silver glitter, I added Claire's Magic to it, so it has a slight purple base instead of clear.

Whenever I add a sprinkling of glitter to a manicure - it is always messy. No matter how hard I try to keep the glitter in a single area it usually ends up all over the place - but the results are pretty 99% of the time.

stuff i used; Avon Bare Necessity Claire's Hollywood Franken, holographic dark purple glitter


swooped on glitter, then filled in between

sprinkled on the dark purple holographic glitter
 

every time I do this { sprinkling glitter onto wet polish } I tell myself ' do it over the sink' = but i rarely do. that is the best way to do this because all the wayward glitter can be washed down the drain.

 in this photo there is a few pieces of glitter sticking up, i gently press them into the wet polish with my finger-tips..... generally i bank on needed 2 or more coats of top coat to get a high shine bump free surface when i use a dense glitter like Claire's Hollywood.


.... and a few more photos


Saturday, June 25, 2011

lather, rinse, repeat - a henna tattoo looking mani


above; index ~ below; middle nail


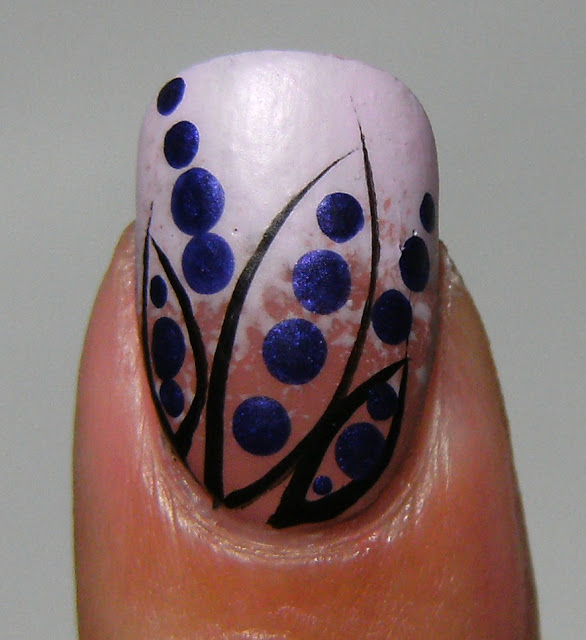
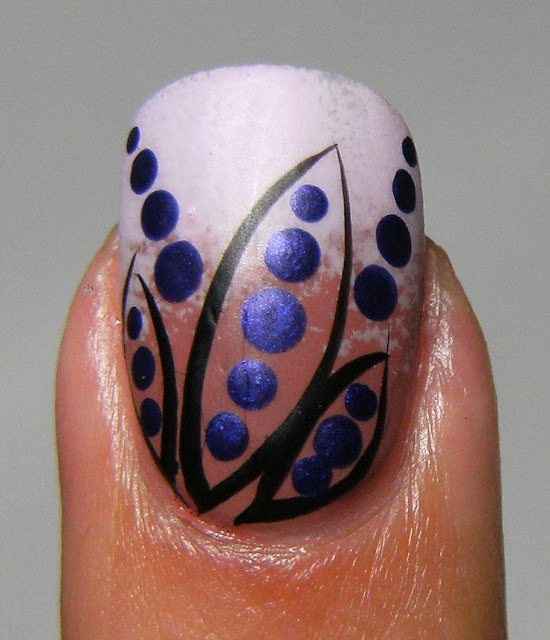
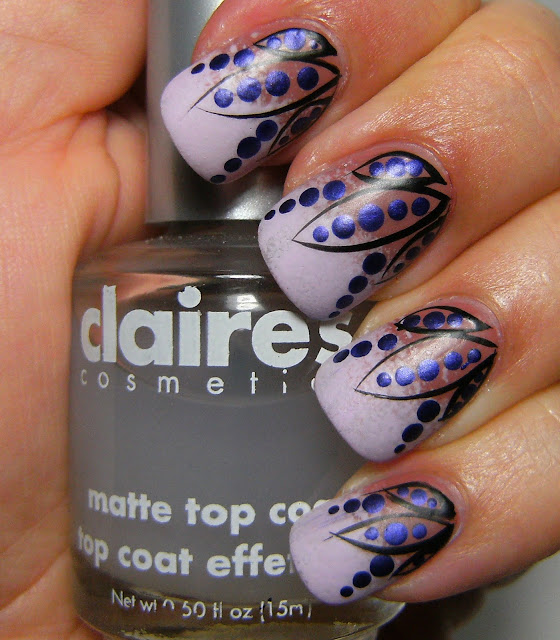
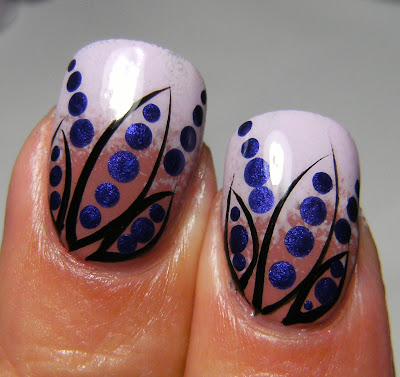
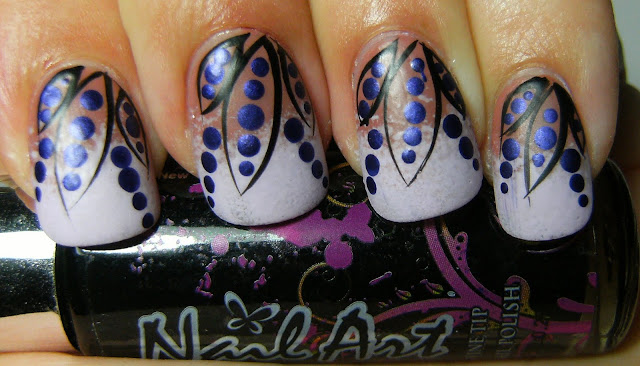
I thought I did this look at least 6 months ago - but I did this just last month...... I called it 'peas in a pod' manicure, but it does look more like a henna tattoo pattern. I wanted to try again; using the stripe polish and different size dots and it turned out lovely.


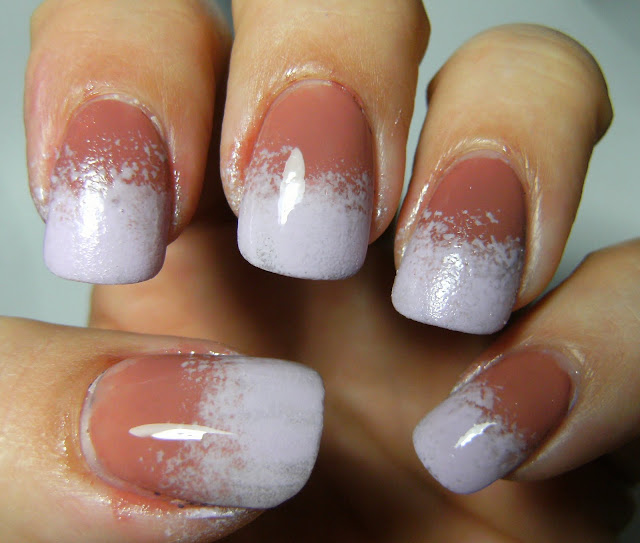
There really isn't much to add to this, so if you need more info, please read the other post HERE. I started off with a base of Avon Bare Necessity, and sponged on Billie Cosmetics Turquois ( lol -it is a light pink with grey tones) I used a black stripe polish, then using a dotting tool I added some shimmery medium purple dots in varying sizes.


I applied top coat on a few nails for a refernce to how TC smoothes out lumps and bumps and helps blend together a sponged look in a photo below. It is amazing how a top coat can smoothe out a lumpy textured polish, doesnt always work on gritty glitters, though.

I used matte top coat for this. I find that whenever I do fancy nail art, and use a shiny top coat I can never get a good photo of the design, so from now on I think I will try to take a photo of my designs with matte top coat.....


this is immediately after i applied the matte TC when it was still wet - so its shiny


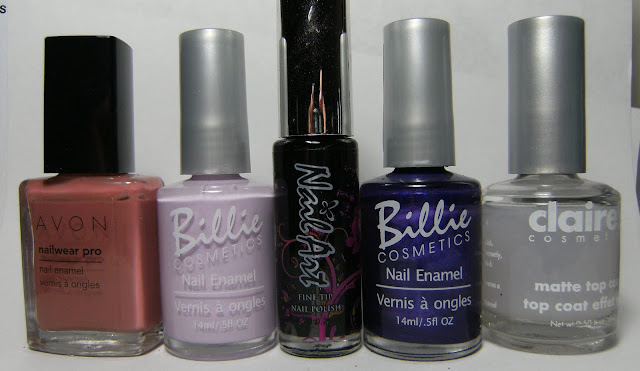
stuff I used;
Avon Bare Necessity, Billie Turquois, Black stripe polish, Billie Purple, Claire's Matte TC


my thumb, middle and pinky nails have top coat, the rest are just the sponged on polish


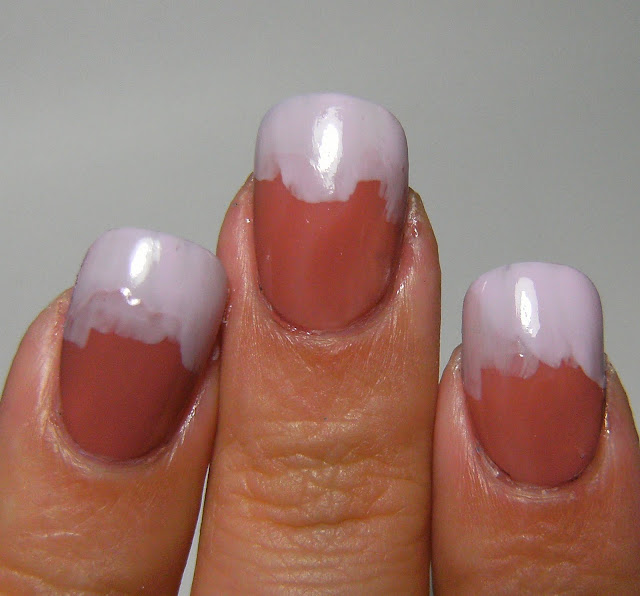
so I cheated! I brushed on the two colours first, then sponged.....

I drew my flower petals or leaves or whatever these are supposed to be


Then added these shimmery purple dots


Avon Bare Necessity


the black stripe polish from The Bargain Shop Canada


... and one more photo!
o


Thursday, May 26, 2011

green zebra nails


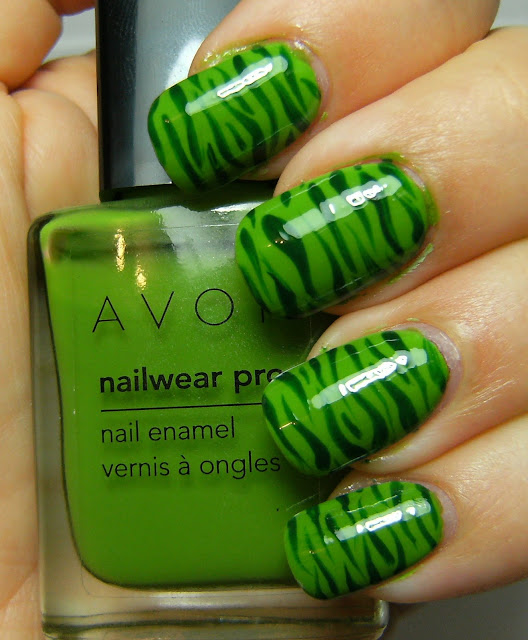
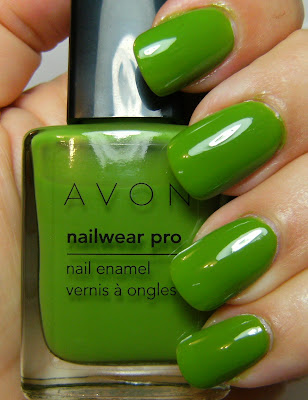
here is a fun ( and quick ) zebra mani. Not as well executed as my last two zebra nail looks, this was a rush job♥ I really wanted to get the best out of AVON Electric Green, here I have layered it over a lovely pastel green but still had to use 3 coats to get to a perfect opacity. I added the deep green zebra stripes to help disguise some brush marks and a cracked index nail.


 Stuff I used for this mani; Avon Electric Green Icing Green stripe polish and Nailene TC


 last week                                                                                   today


layering didn't help much

I still would need 3 coats to hide any brush marks or bare spots, all I really achieved with layering AVON Electric Green was a bit of a deeper colour. I do love this polish below; Icing Bamboozled Again, and wear it on my toes quite often. Below - on my pinky nail - is 1 coat of Avon Electric Green layered over 2 coats of Icing Bamboozled Again.


....and one more photo

Wednesday, May 25, 2011

Avon Midnight Plum with Pure Ice Cheat'in


This is 3 coats Avon Midnight Plum, with a sponging of Billie Cosmetics in Alloy which is a lovely pink/purple metallic polish. I added 3 coats of Pure Ice Cheat'in  and a thick coat of Top Coat. For some reason I did not take photos of Avon Midnight Plum alone.....  I thought the glitter would be lost layered over Midnight Plum, so I decided to add the metallic polish for good contast.

I definitely needed 2 coats of TC to hide all the bumps from this glitter polish - Pure Ice Cheat'in is a lovely mix of sapphire blue and magenta glitter. Its a shame that I have only worn this polish 2 times since i bought it 3 years ago!!!!

indoor florescent

stuff I used AVON Midnight Plum, Billie Alloy, Pure Ice Cheat'in & Nailene Top Coat

I first sponged on Billie Alloy; a purple metallic polish


AVON Chocolate Deluxe with Claire's Goldmine


This was my mani from yesterday - not terribly creative, but flashy enough for a cold gloomy Tuesday


3 coats of AVON Nail-wear Pro Chocolate Deluxe. This is a lovely brown polish with prominent gold shimmer. Like all the Nail-wear Pro polish's I have tried this applied wonderfully and dried fast. I swooped on Claire's Goldmine, starting from the side of my nail and fading towards the center.


3 coats of AVON Chocolate Deluxe - No Top Coat


Claire's goldmine is a translucent gold with silver and gold holographic glitter. I also have the silver version of this polish. I wore this earlier this year - it is a hoooooongy glitter and needs 2 liters of top coat to smoothe it out. 

When I use a glitter polish with properties like this I try to use as little as possible. Mainly because removal is a pain in the bunz, but also a polish like Claire's Goldmine will need 2 or 3 coats  they suck up top coat and remain 'textured' even after 2 or 3 coats.


here is 1 coat of AVON Chocolate Deluxe - this polish leans on the red side of brown


and 3 coats with No TC


These next 3 photos are not necessary for this post, I am trying out different setting on my camera, and different indoor locales for lighting. In Central Canada it is still chilly: I haven't put any plants in yet, and have only been able to wear sandals 3 times so far THIS YEAR.

sun - 4:45 p.m.


shady office 4:45 p.m.


indoor flourescent