Showing posts with label Brand - Revlon. Show all posts

Wednesday, March 20, 2013

Diagional Mani w/ Revlon polish


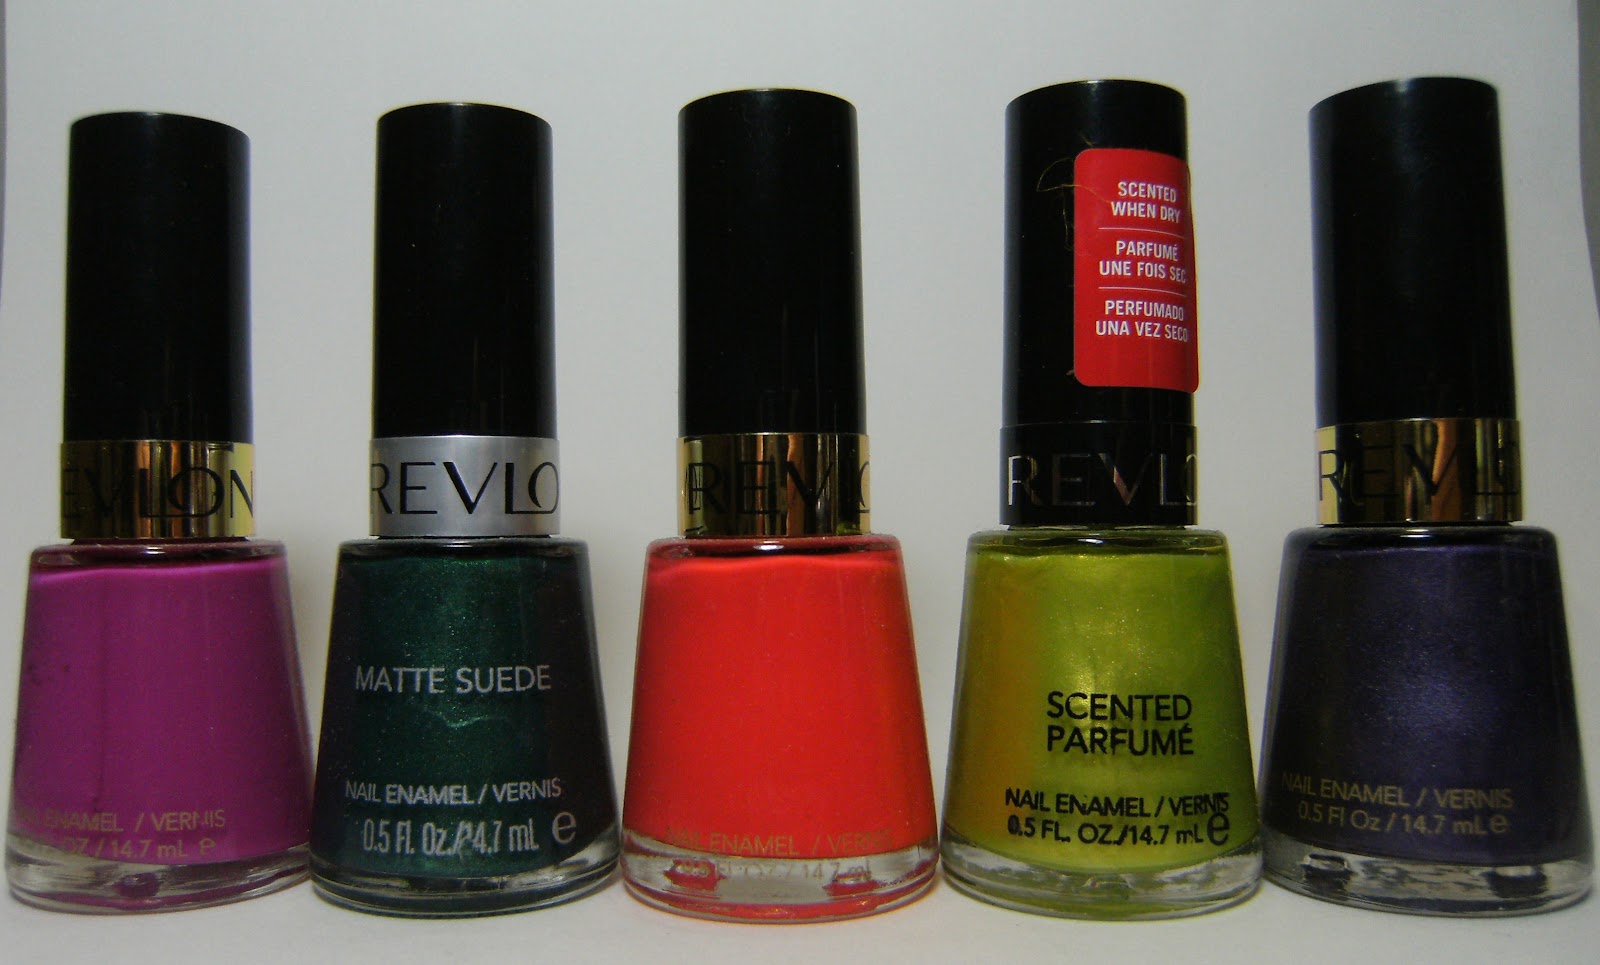
 Here is a simple diagional mani with Revlon polish. I picked up one of those 5 sets of Revlon polish's at a discount store for 10 bucks. Like almost every Revlon polish I have they were sheer and needed 3 to 4 coats to opacity and to hide any bare spots. Plum Seduction and Emerald City were the exception, but the other three below, No Shrinking Violet, Craving Coral and Beach need 3 or more coats to opacity. I do love all 5 shades, and @ 2 bucks each I cant really complain that much.


I have noticed Revlon Polish as well as Sally Hansen Complete Salon Manicures polish showing up at DollarRama stores in Canada with some pretty colours, I try to snap up th Sally hansen's but am skipping the Revlons due to their track record of rediculouly sheer and slow drying. (  I'm so mean !!! )


L-R=No Shrinking Violet, Emerald City, Craving Coral, Beach, Plum Seduction

For this mani I started with 2 coats of No Shrinking Violet, waited for it to dry, then applied the tape diagioanlly across my nails, then added 1 coat of Plum Seduction ( I needed 2 but I was lazy ) I gave it a few minutes and removed the tape and added 1 coat of TC. I did have some polish bleed under the tape:(


2 coats of No Shrinking Violet. This is a pretty colour but very sheer and I DEMAND 2 coats to opacity for all my nail polish's.

 I found this tape at the office supply store - it is used for taping off sections of  a white-board to create charts and schedules etc... it works on dry nails just like scotch tape.....


 stuff I used for this Mani
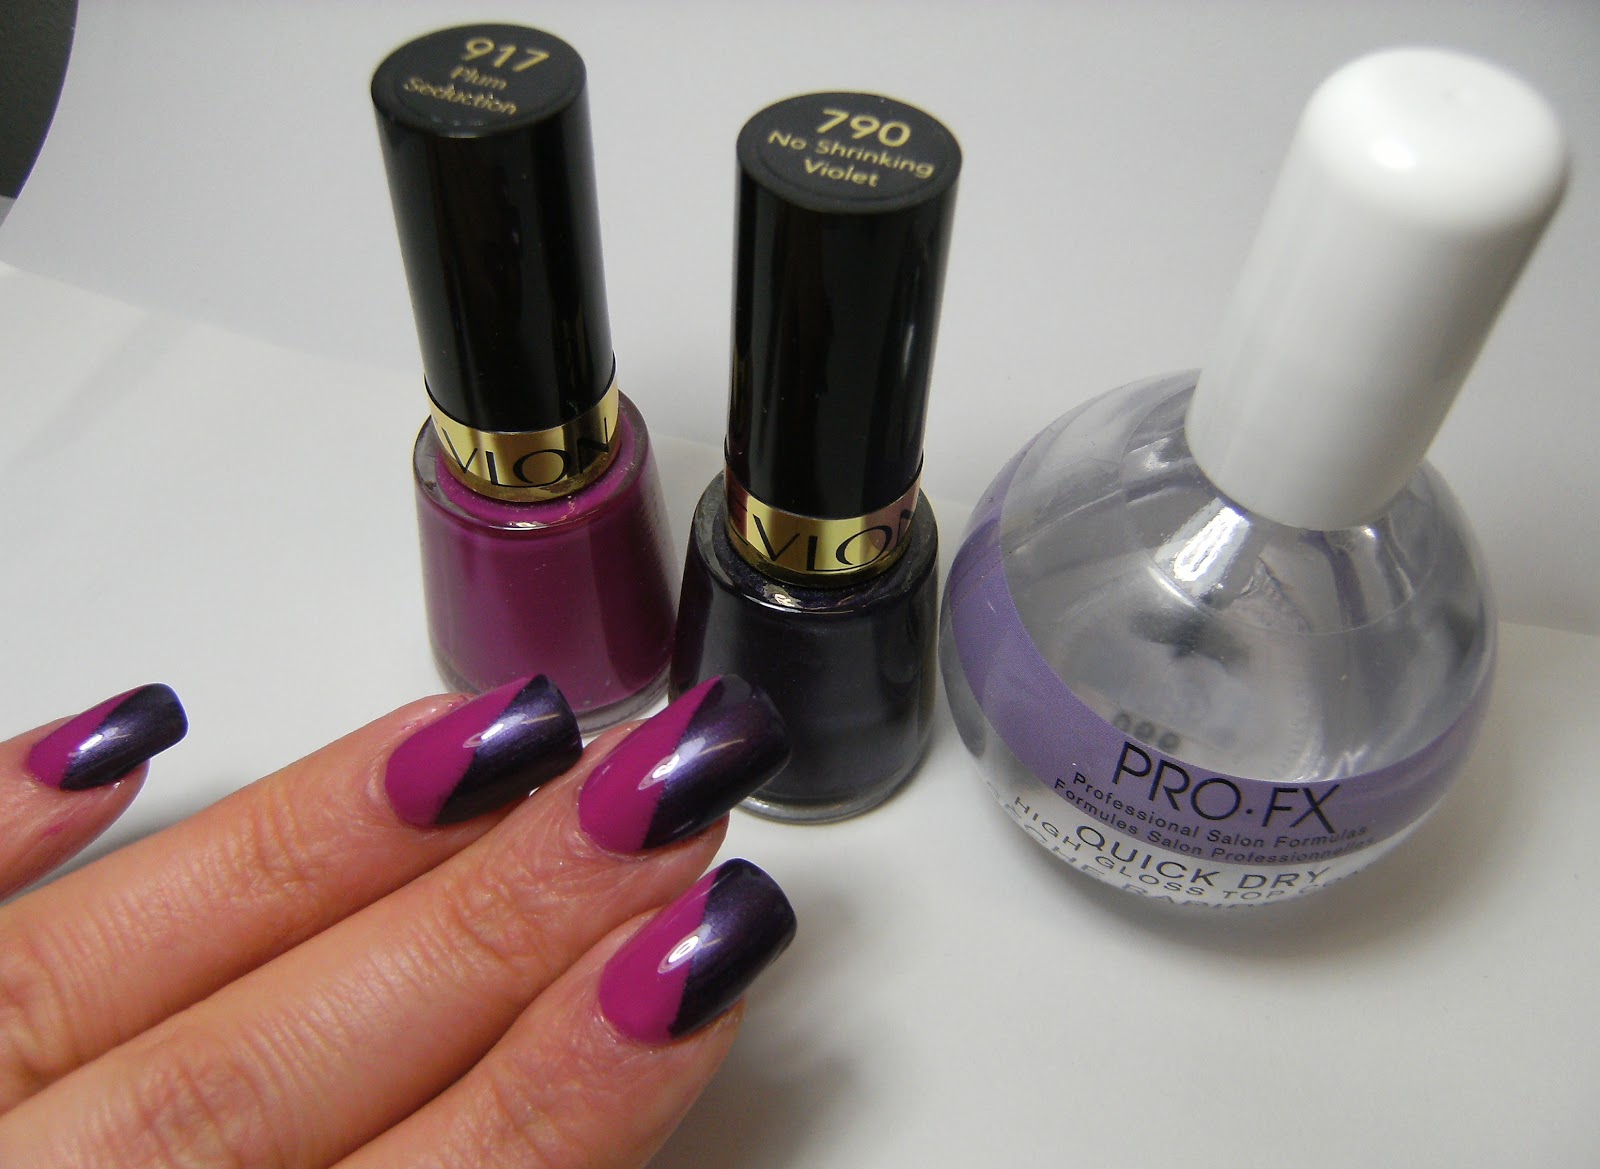

 Plum Seduction is a beautiful dark purple metallic - needs 2 thick-ish coats though......
o


Sunday, March 17, 2013

fan brush nail art


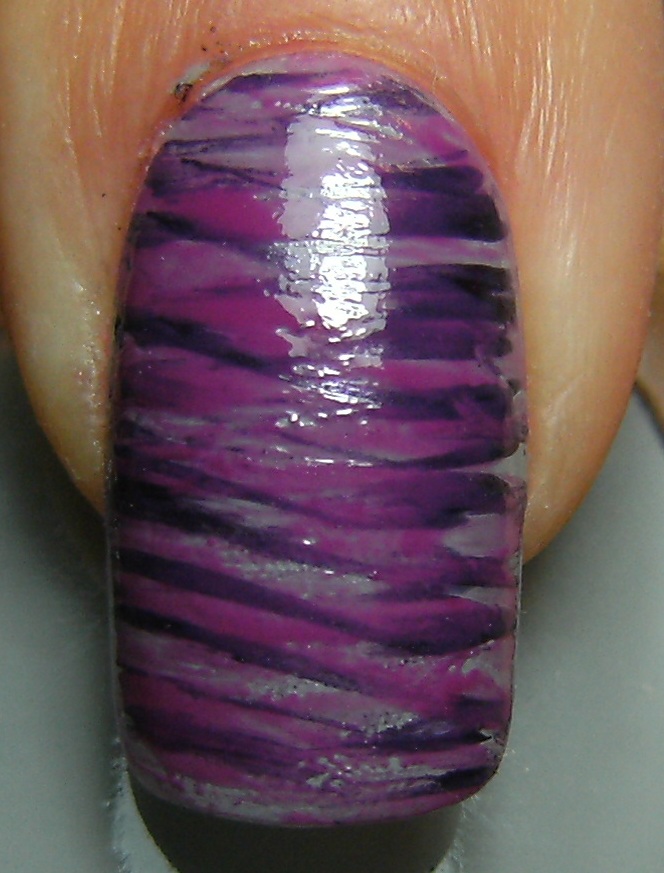
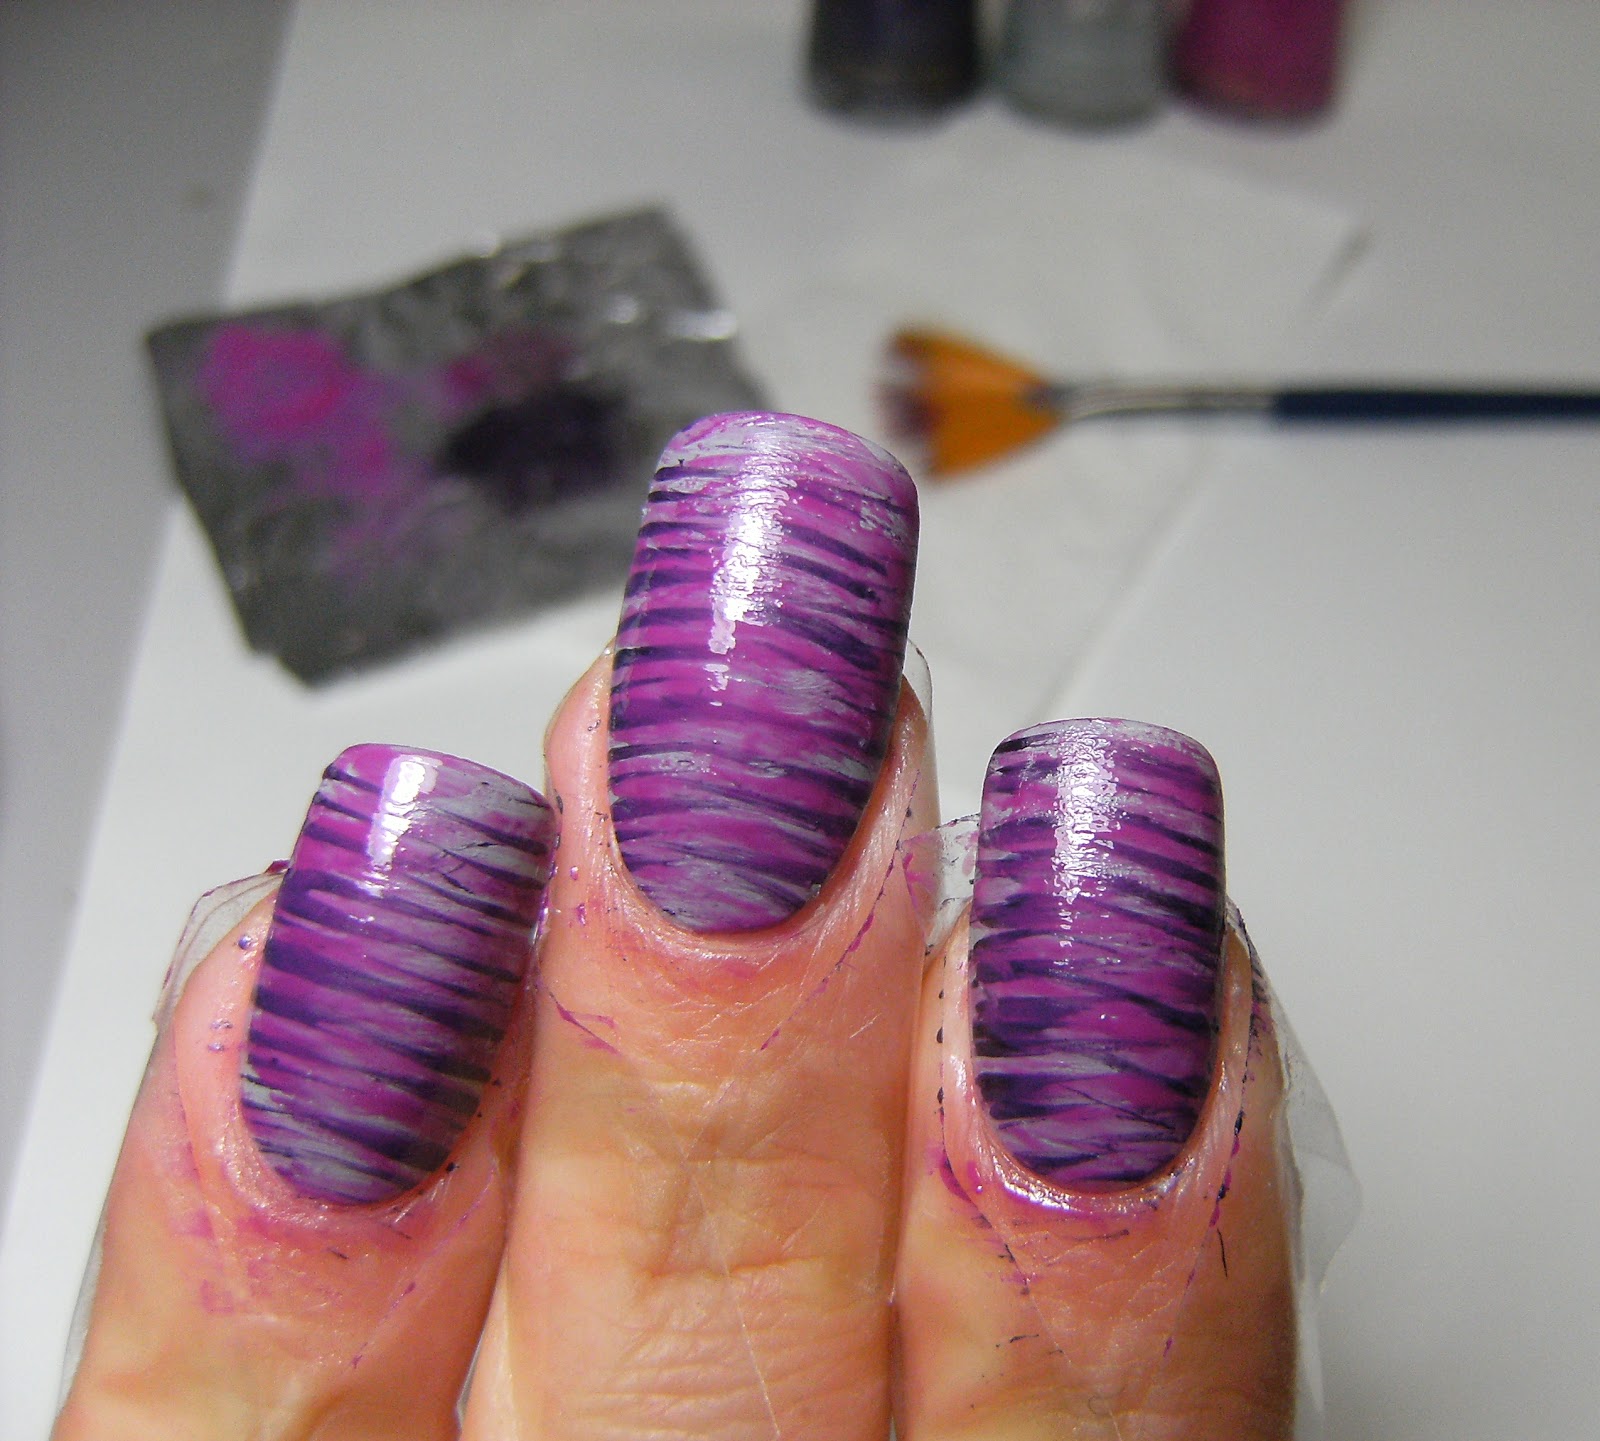
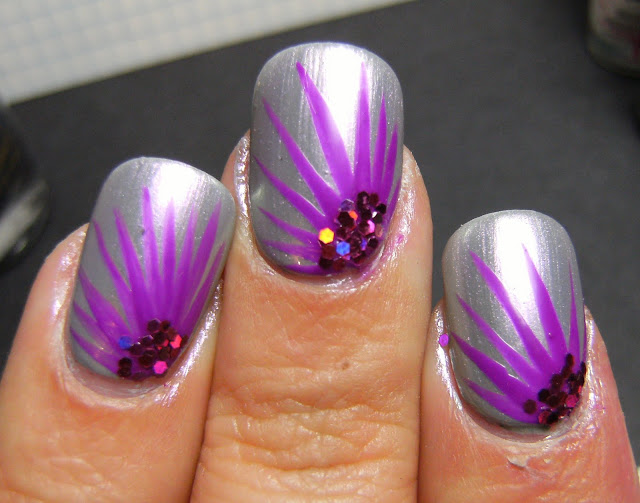
 I have seen this fan brush nail art a few times and it always looks great! I am not sold on it yet as this was my first try - - I think adding Pure Ice Busted made me like it alot more then just the 2 Revlon polishes alone.

For this Mani I started with a base of Revlon Hazy, a grey creme, then used the fan brush to make these interesting whispy stripes. Some people are getting super duper thin whispy stripes and they look amazing - I'll be striving for that next time I try this.

fan brush nail art                      ----                       w/ Pure Ice Busted

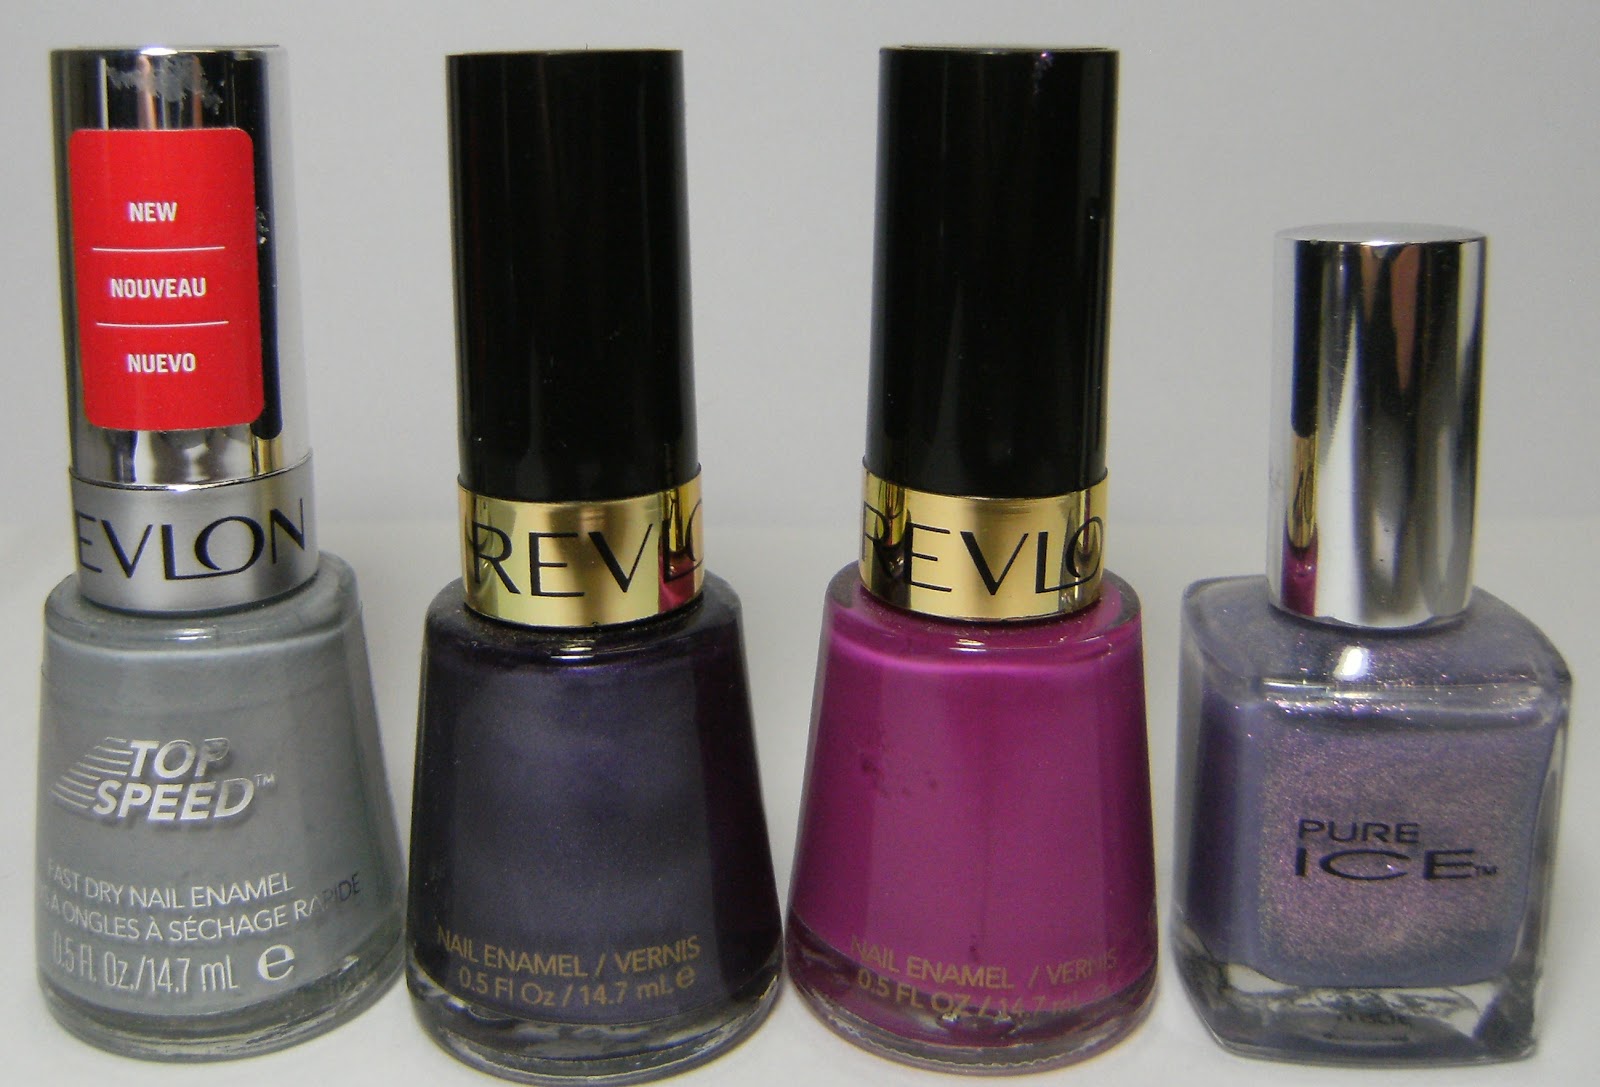
 stuff I used - Revlon Hazy, No Shrinking Violet, Plum Seduction, and Pure Ice Busted


  I found the fan brush at the DollarRama ( Canada ) I made sure to tape around my nails to prevent having to do an acetone clean-up later.

Revlon hazy - a grey creme and the only Revlon I have ever purchased that I can say I am happy with. If I purchase any more Revlon nail polish's in the future I will make sure they are either opaque creme polish's or heavy duty glitters.


Here is my right hand that turned out pretty crappy - but it is my first time and I am sure if I try this again I will get better!  It was hard to pick up the right amount of polish with the fan brush ..... I will definitly try to use a slower drying polish in the future as well.


I did a practice run with colours that I thought would look good together

a few more glamour shots.....


o


Saturday, March 16, 2013

Melted Celluloid nails (water spotted)


I am calling this water-spotted decals..... I have never been able to water-marble successfully, so I try to either make decals by dropping polish onto plastic and swirling it around, or doing a traditional water marble and dropping a cut up piece of zip-loc bag onto the design, letting it dry then affixing it to my nails......

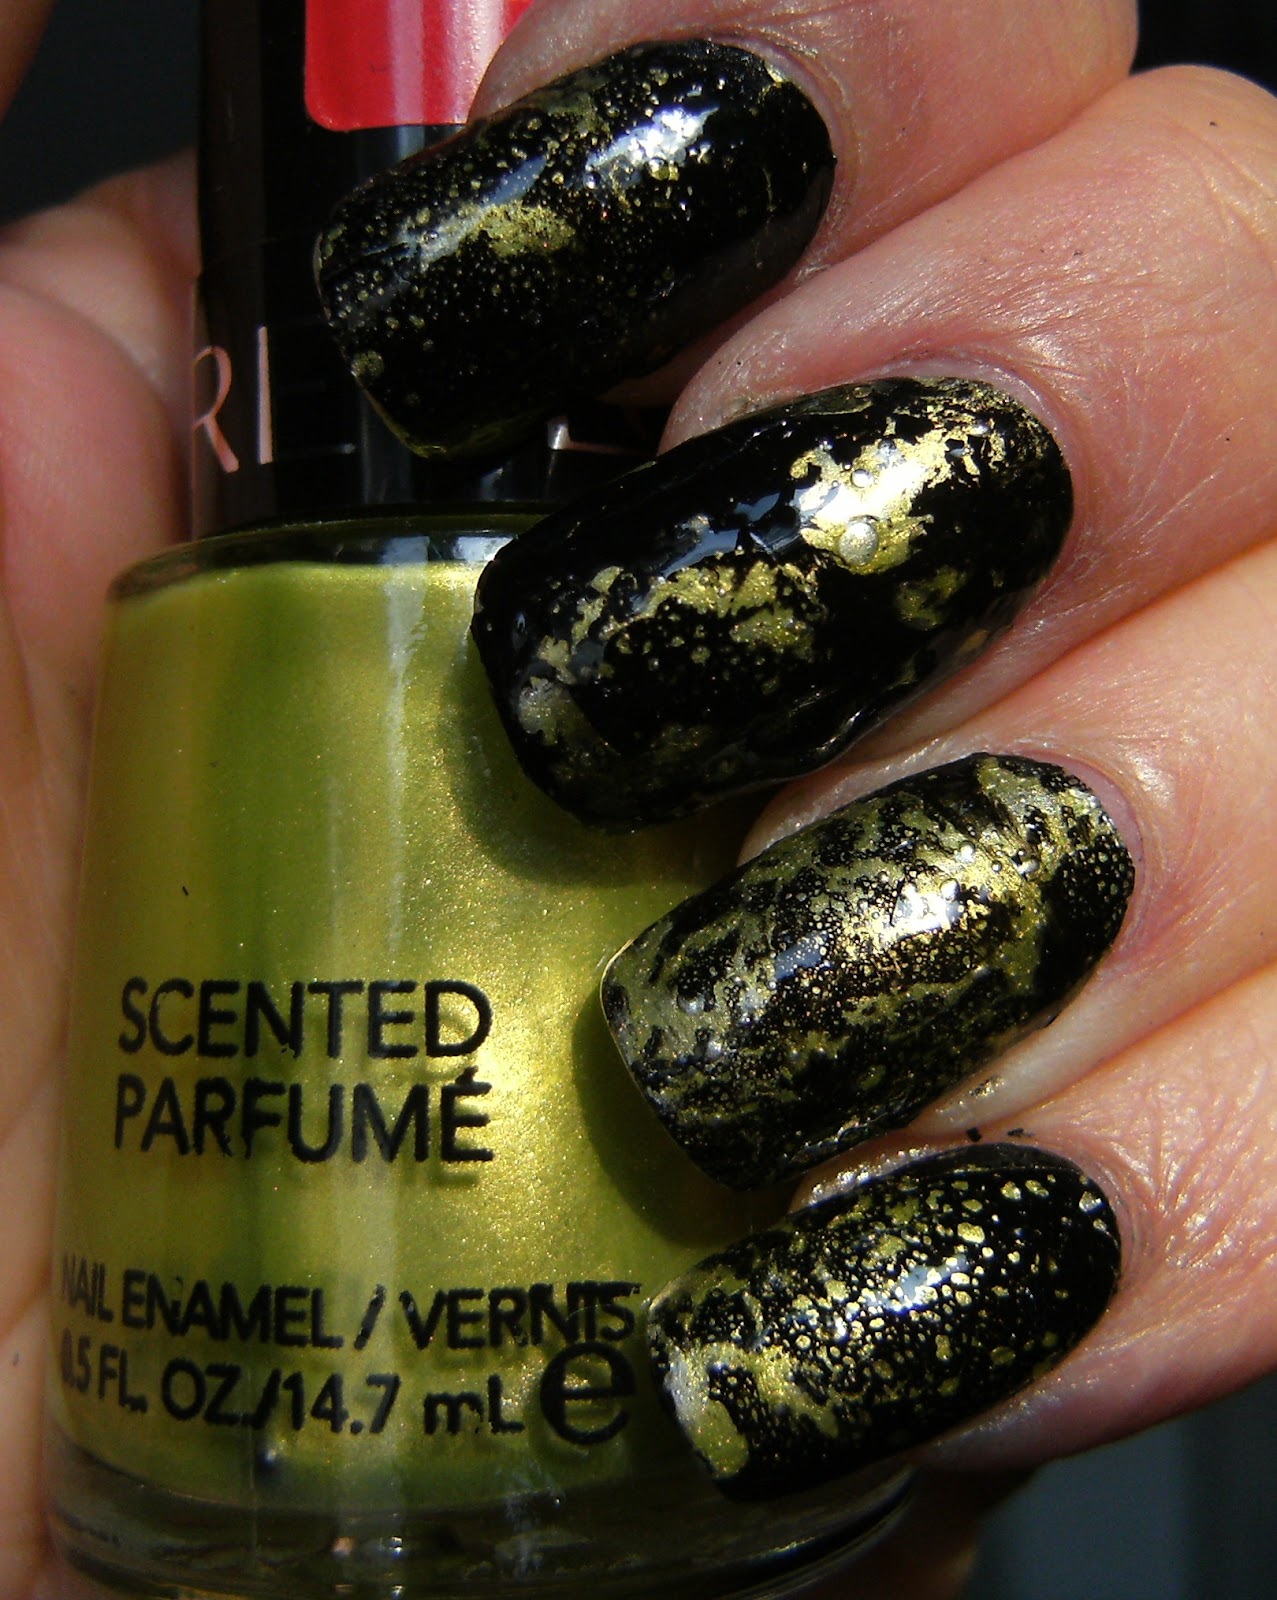
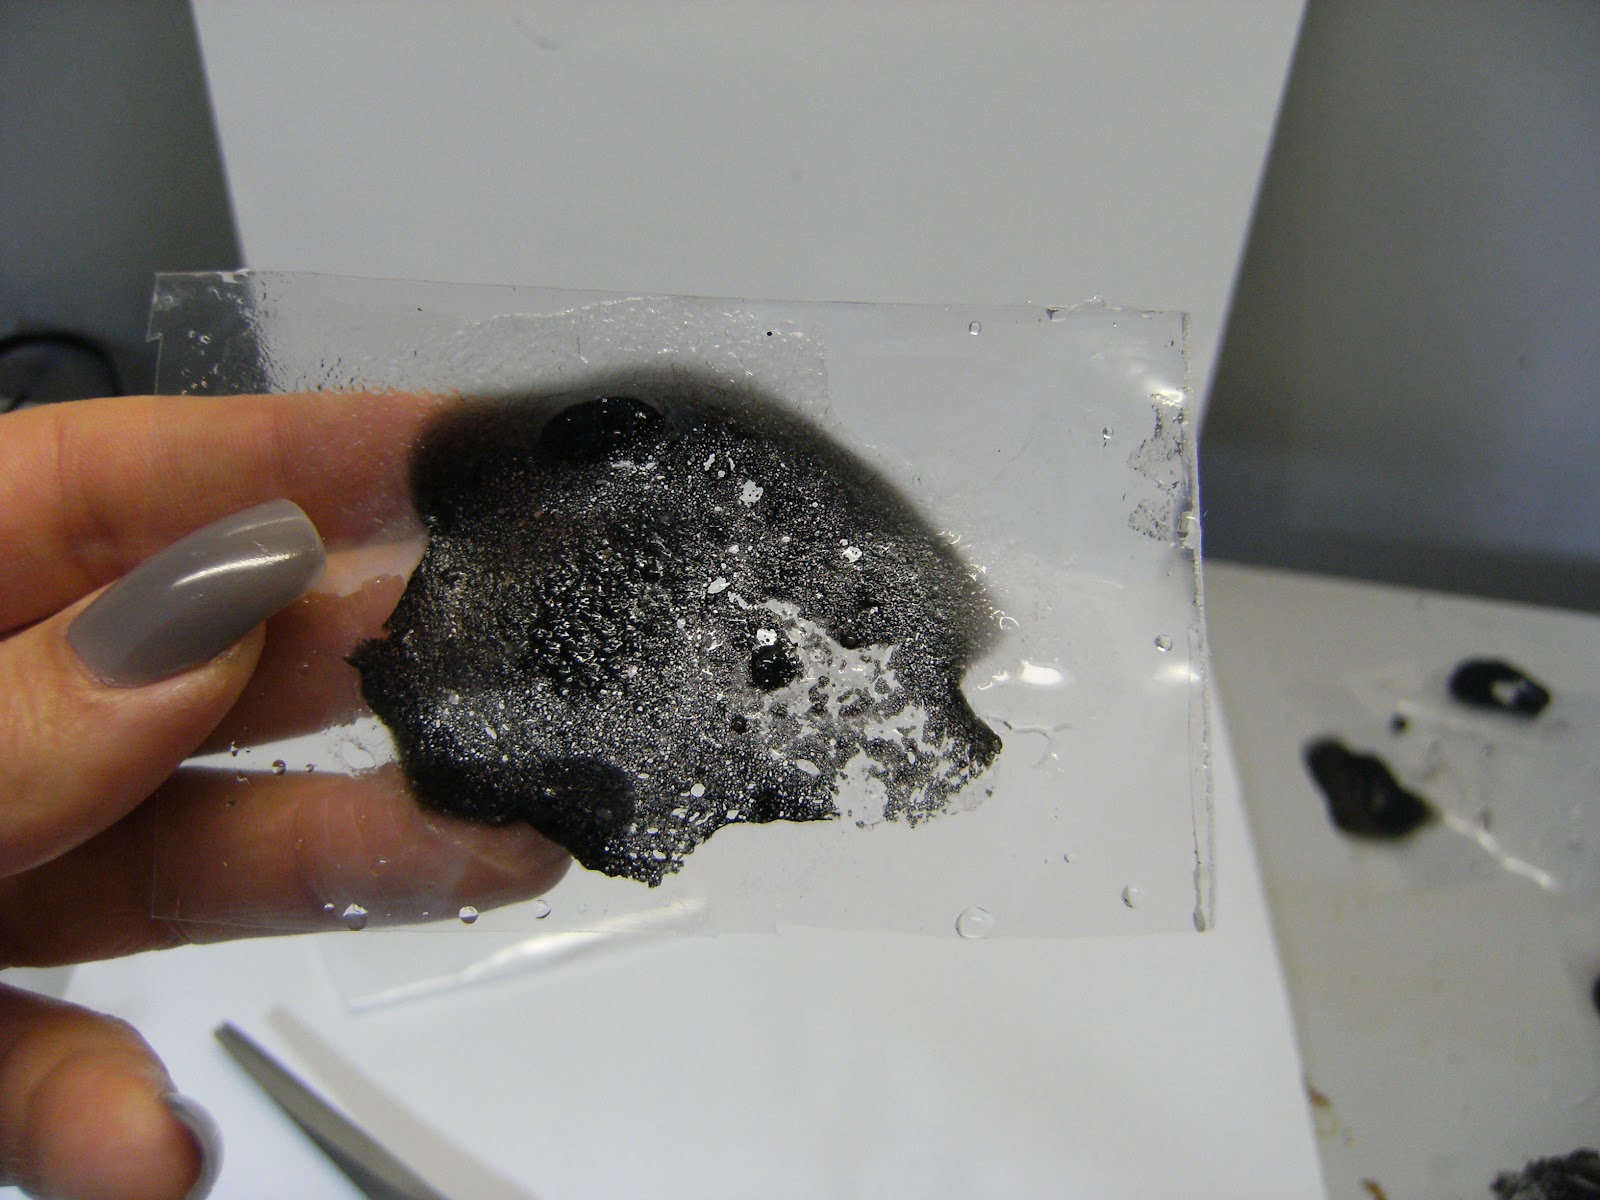
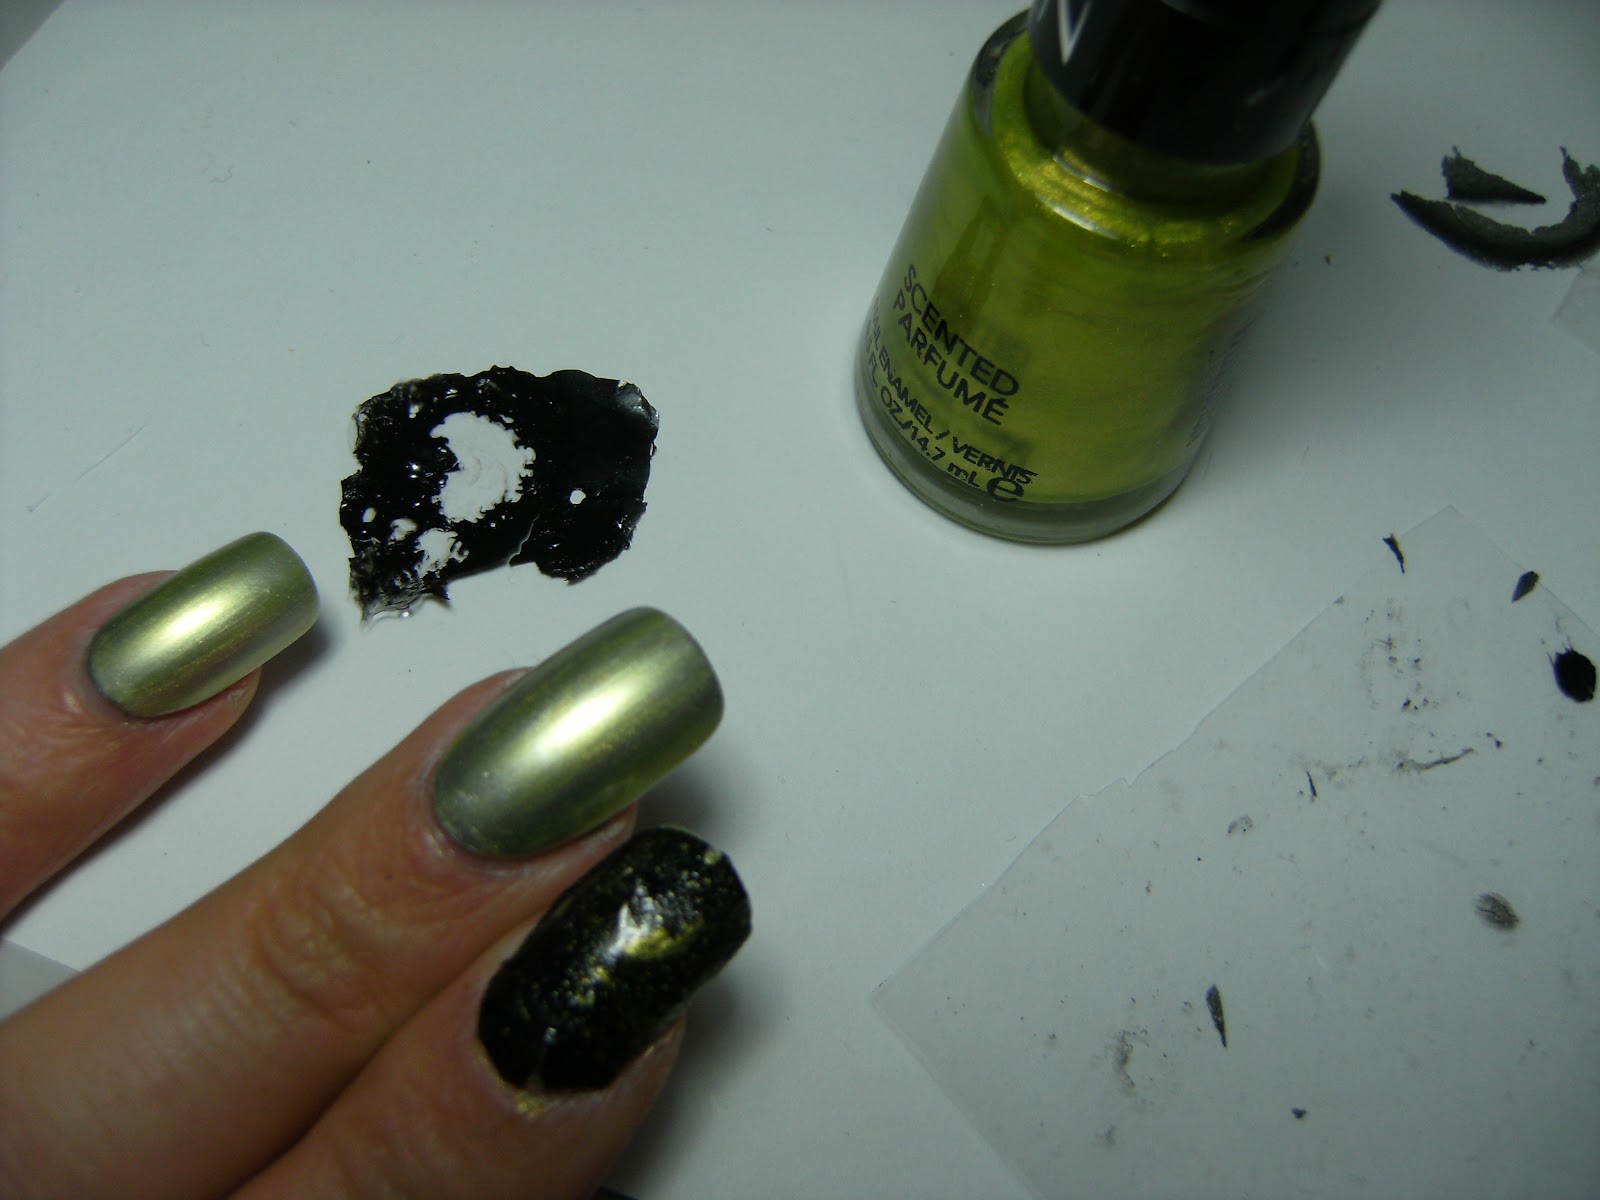
I saw this on Bella sugar and a few other places on the interwebs..... I dropped a few drops of a black creme polish into water then sprayed it with hydrogen peroxide to break up the polish and create 'holes' ( perfume worked too! ) then placed a small piece if plastic on top of the design to pick up the black spotted polish.....I didn't achieve the results that other people have with the big perfect 'holes' but I am happy with how this turned out.

I let the polish things dry for a little while then affixed them to my nails, I filled in a few bare spots with a black Sally Hansen nail art pen, then added a coat of TC. Even thought there was some lumps and weird bulges, a thick coat of  TC smoothed them out.


I think an orange or reddish-orange base would have been better for this nail art  - I have enough of these black-spotted-water-marble-things to do this again....but honestly I wouldn't try to this again, I think I could get the same look with saran wrap or sponging in way less time.


I started with 1 coat of Sally Hansen Chrome in Diamond

 then I coat of Revlon scented polish in Beach - it smells really good!

 before I applied the sheet of 'spotted polish' to my nail I added another coat of the green Revlon polish so it had something to stick too and gently pressed it into my nails


 I used wet n wild black for some of these, but after I let them dry on my desk for  a while they started cracking..... I don't recommend using Wet and Wild for these types of water decals......


 these were super-duper thin so I dumped a pretty thick layer of clear nail polish over them. It made them way easier to handle when I was applying them to my nails.


 cutting these into smaller nail shaped pieces and using tweezers to place them on my nails made getting these onto my nails way easier.......


I can knock this off my list of neat nail art to try out.........

o
Tuesday, April 26, 2011

BOOM! Glitter explosion


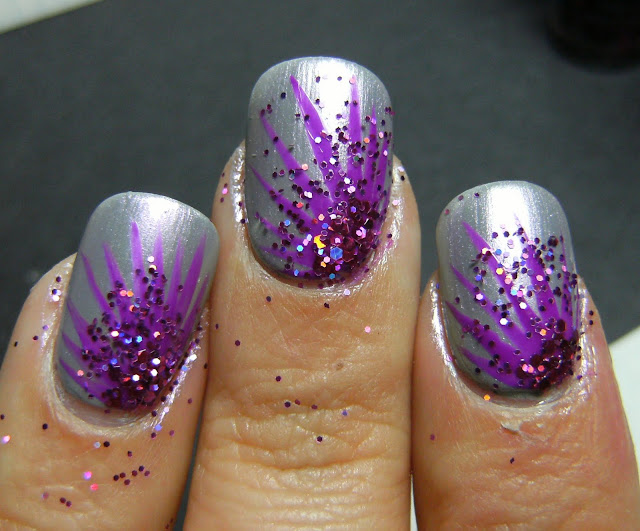
this is 2 coats of Revlon Hazy, followed by 2 coats of Sinful Colors Aruba Rhythm. i used my new stripe polish to create the lines, then applied a blob of clear polish and added the larger magenta holographic hex glitters to the base of the lines, then swept more clear polish sort of following the lines and gently sprinkled on the smaller holographic magenta hex glitter.

I tried to place the large hex glitter on my nail individually, but it was taking too long, so I added a blob of clear to the base and scooped it up and sprinkled it on my nail. I used a fluffy brush to pick up the smaller glitters and tapped and waved it over the wet clear polish. Glitter is fun to use for mani's but very messy.

This is one of my favorite easy to do looks. It did eat up alot of top coat - next time I won't use so much glitter. If it is a holographic glitter a little goes a long way.  On my right hand I did not add the shimmery Sinful Colors polish and did not add a s much of the larger holo hex glitter, I liked it better then with the shimmery polish and if I repeat this look I will be sure to use a plain creme base for my lines & glitter.


stuff  I used; Revlon Hazy, Magenta stripe polish & two sizes of  Magenta holographic Hexagon glitter

drew lines, blobbed clear polish and added large glitter to base of lines

 added clear polish along lines and sprinkled on smaller glitter

added 2 coats of TC


Revlon Top Speed Hazy, 2 coats with Top Coat

2 coats of Revlon Hazy & 2 coats of Sinful Colors Aruba Rhythm with Top Coat

I'm doing all my glitter work over the sink and washing down any fallout - glitter is messy but beautiful
♥


Friday, May 14, 2010

♥ Claire's 'Magic' vs. 'My Precious' franken ♥

Claire's 'Magic' on my middle finger; kicks bunz and cannot be eclipsed in any way, shape or form

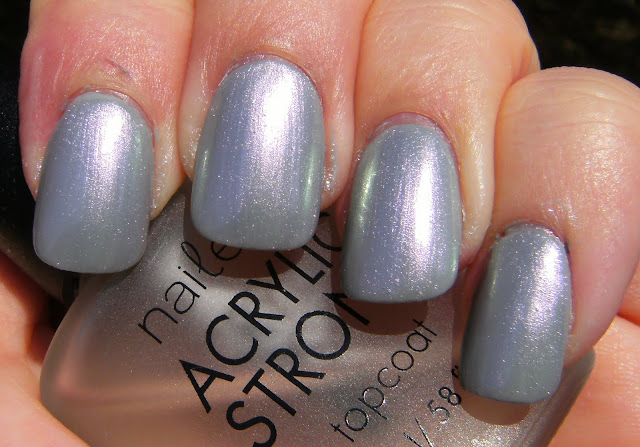
....... Well, there are some gorgeous polish's as lovely as Claire's Magic but in regards to my franken, Claire's 'Magic' is way waaaaaaaaaaaaaaaay prettier. It is more crisp and bright and the intense hottt pink micro-shimmer is very evident even in low lighting and makes this polish so special ( to me, anyways ). Claire's 'Magic' on my middle finger is 3 thin coats with 2 coats of Nailene Acrylic Strong Top Coat, while the rest of my nails are 3 thin coats of my recent franken 'My Precious' and 2 coats of Nailene Acrylic Strong Top Coat.

hmmmm, the base colour of Claire's 'Magic' is a bit more brighter than my franken. 'My Precious' when compared to 'Magic' seems more muted and without the intense pink micro-shimmer. The micro-shimmer in my franken is more on the rose/dusty rose side.  At first coat, my franken appears to have a bit of a more blue base, while 'Magic' is more of a vibrant Blurple. They are both very pretty.

I made this using an older Sally Hansen polish called 'Opal Truth' from the Maximum Growth line, and a few drops of an older Hard as Nail polish 'Radish'. I had no plans to make a sorta dupe, but I totally wowed myself with my franken skillz on this one!  I have alot of empty bottle's at the moment and am excited for the weekend so I can get to some frankening......


Have a great weekend Everyone!

L to R - franken 'My Precious' - Claire's Magic

L to R - 1 coat of 'My Precious'  - 1 coat of Claire's 'Magic'

FLASH! - Claire's 'Magic' middle nail......here you can really see the slight difference

Sun

Sun
♥


Thursday, May 13, 2010

♥ 'My Prescious' - franken made with an old, old Sally Hansen ♥

Franken  My Precious 3 thin coats with 2 coats of Nailene Acrylic Strong Top Coat

Firstly - there is like 30 photos in this post - sorry, I had to post them all. I'm glad I have alot of previous manicure photos on my desktop, becuase I am enchanted with this franken I made and don't want to take it off. I made this franken polish with Sally Hansen Maximum Growth 'Opal Truth' and Claire's 'Matte Cobalt'. I fulled up an empty bottle of Revlon Color Stay 1/2 way with the Sally Hansen Opal Truth, then added approximately 10 drops of the 'Matte Cobalt'.

I imagined that these 3 frankens would be very sheer, and planned to use them as layering polish...... But they are holding their own and are great at three thin coats. All three maintained the intense shimmer from the S.H. 'Opal truth' The teal polish, in the middle was made with Chg 'Shower Together is really cool. It is a teal shimmer with a pink flash - how cool is that! I named it 'Shower For Three' = That I will definitely be wearing next.

I saw this very same Sally Hansen Polish on MUA for trade, remembered that I had it and decided to pull it out of my stash and make some frankens with it. No sense of it just sitting in a box when I could put it to good use ♥.

When I'm ready to take this mani off, I will do a comparison with Claire's Magic. I'm super duper happy that I used a pretty polish that I never wear, and made something beautiful out of it. Below is a photo of the three frankens I made using Sally Hansen 'Opal Truth'. I will do a skittlez eventually and wear these beauties as full mani's. I love opalescent polish's - they are usually easy to find in discount and clearance sections and they make great frankens.

L to R -  I filled up these old empty Revlon Color Stay bottles 1/2 way with Sally Hansen Maximum Growth 'Opal Truth' I used Sally Hansen 'Radish' ( dark vampy purple) China Glaze 'Shower Together'  and Claire's  'Matte Cobalt'. 

I named them L to R- 'Natural Radish', 'A Shower for Three' and 'My Precious'. I have already modeled 'Natural Radish HERE, and will be wearing 'A Shower for Three'  ( or 'Shower 4-3' what'ev's ) next!


Here's a million photo's.  It's a bit overkill, but i was just so happy to have natural sun that i literally took 99 photos outside and of course Blurples are ridiculously hard to photograph. Thankfully I had a little bit of sunshine here around supper-time, so I got some gorgeous outdoor photos. It's so bizarre that cameras cannot capture these kinds of weird blue/purples.

Sun

Indoor fluorescent

Cloudy

Flash

Sun

Shade

Sun

Sun

Sun

Sun

Sun

Sun

Overcast / Cloudy

Flash

Shade

Sun

Sun

Setting Sun

 Shade

Sun

Indoor fluorescent

Indoor fluorescent


Thank You sooooooo Much Sally Hansen Polish 'Opal Truth' I will never forget you and your memory will live on in these three gorgeous frankens I made.

♥